This article shows a recent bathroom installation in Roundhay, Leeds. All work carried out by ukbathroomguru.com.
What we do
We install quality bathrooms from start to finish, with all the bits in between taken care of.
We provide advice and guidance during a free site survey, and we have a blog with lots of articles that cover frequently asked questions and show you examples of our recent work.
We install bathrooms from start to finish, supplying all the necessary trades and project managing the whole process, so you don’t have to!
We work to detailed, itemised estimates with fixed costs, so you can budget properly without fear of unexpected skyrocketing prices.
Our focus is on doing a proper job for a fair price in a reasonable time – see here for more info
Case study
As part of this recent bathroom fitting in Thorner, the following work was done:
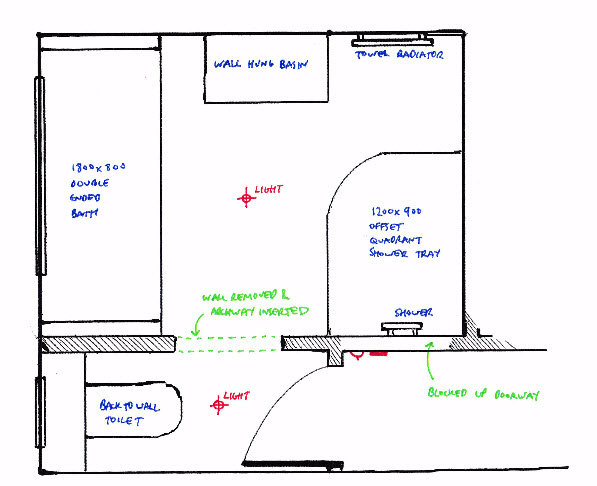
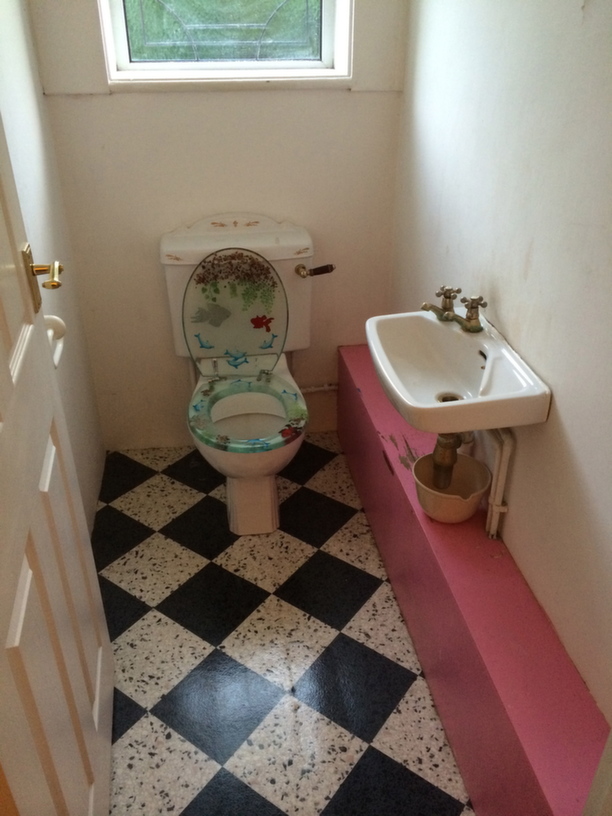
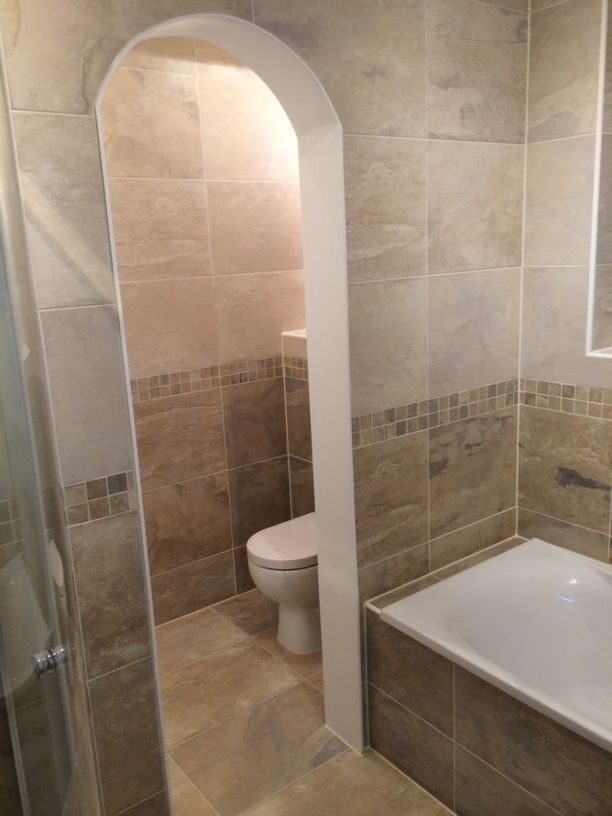
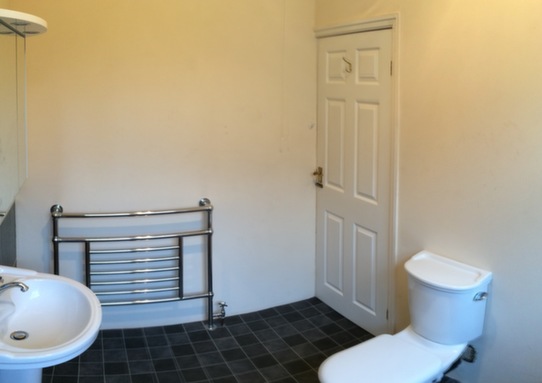
The new design involved knocking a small cloakroom and a bathroom together into one large room and accessing the space through the existing door into the cloakroom.
Therefore, the existing toilet & basin pipework were removed and altered to suit the new layout.
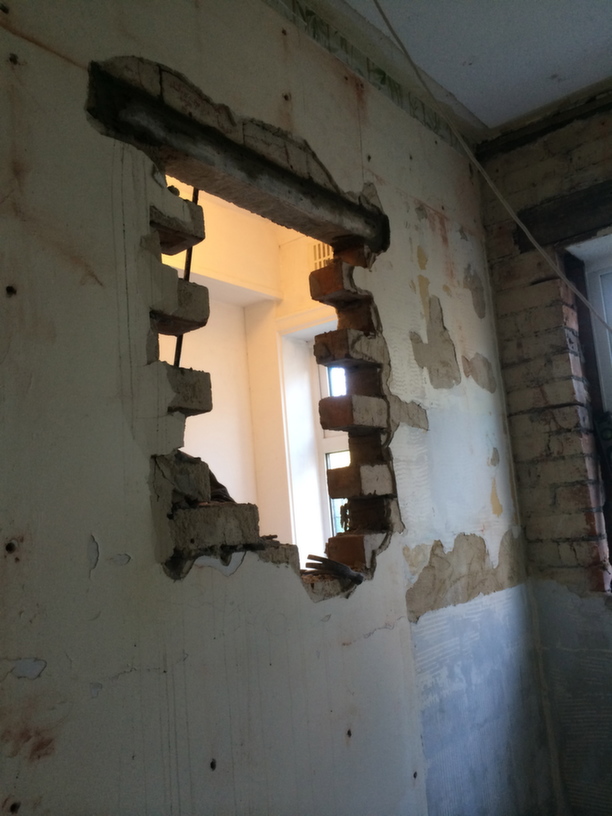
An archway was to be added between the 2 rooms so an opening in the solid brick wall had to be created by inserting a concrete lintel and removing the bricks beneath.

The finished result was an elegant transition between the 2 rooms.
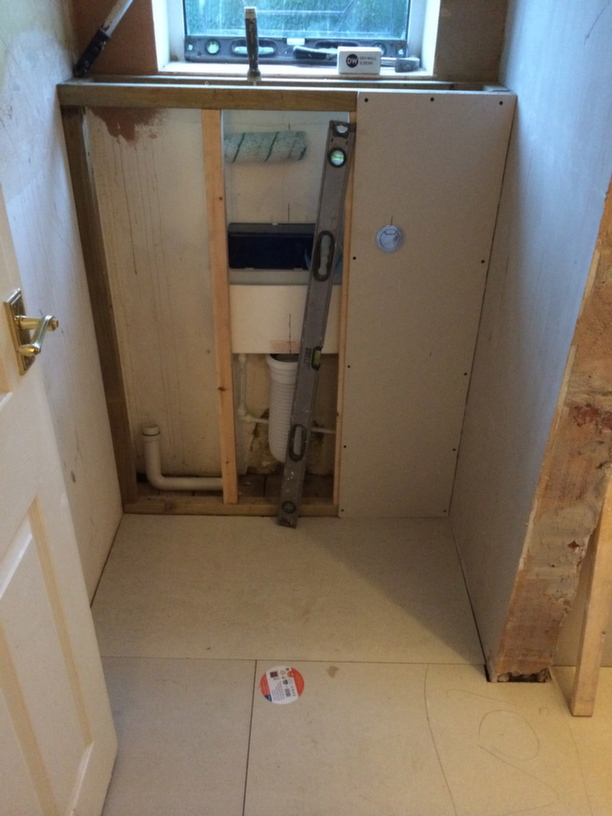
Jumping back in the process a few days you can see how a wooden framework was built to conceal a hidden cistern.
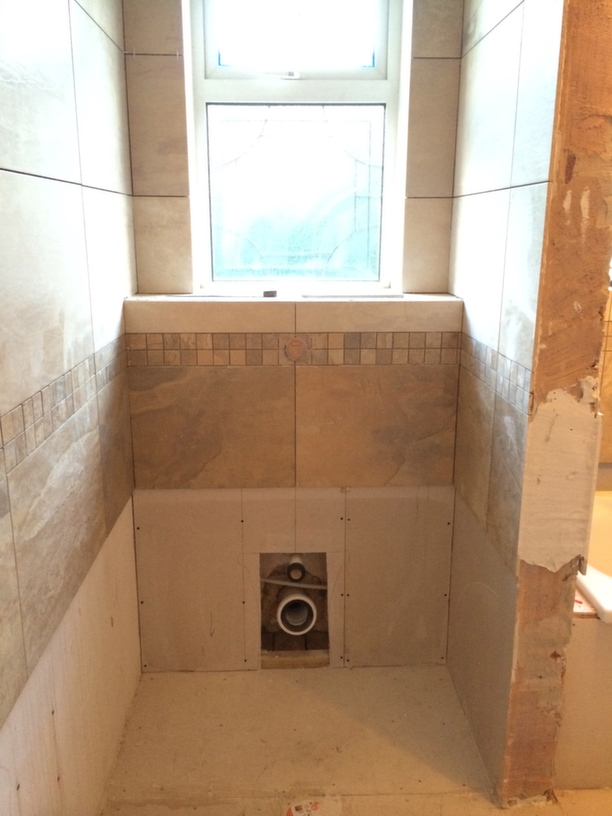
This frame was then boarded and tiled after all the pipework was installed & tested.
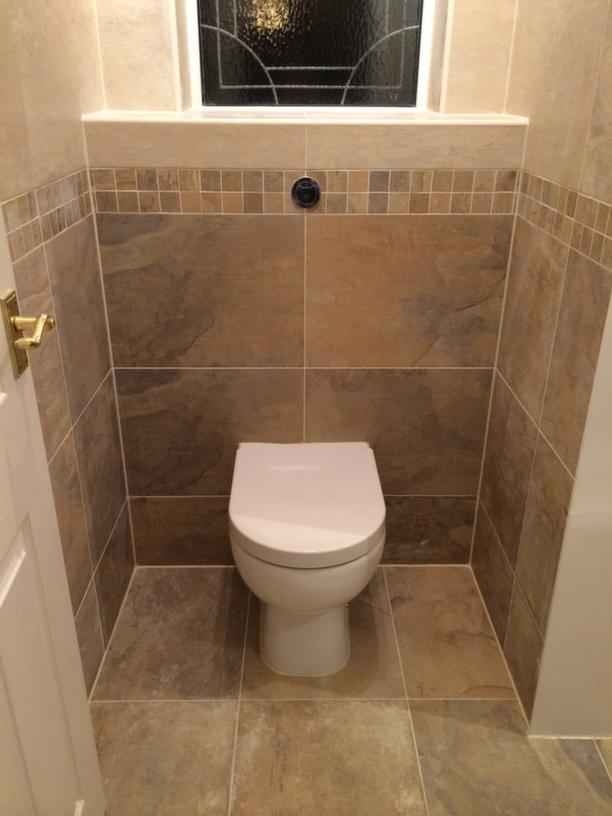
The finished result is an elegant minimalist toilet with a chrome dual flush button.
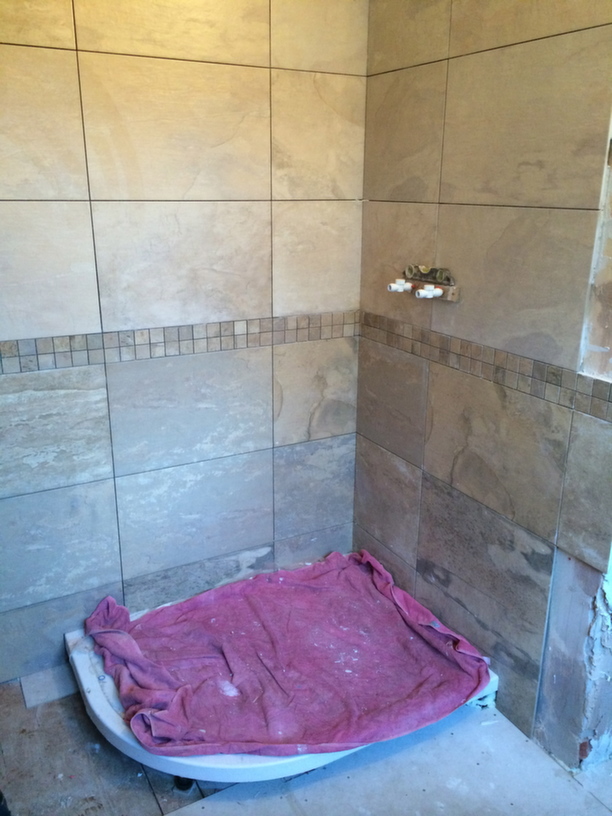
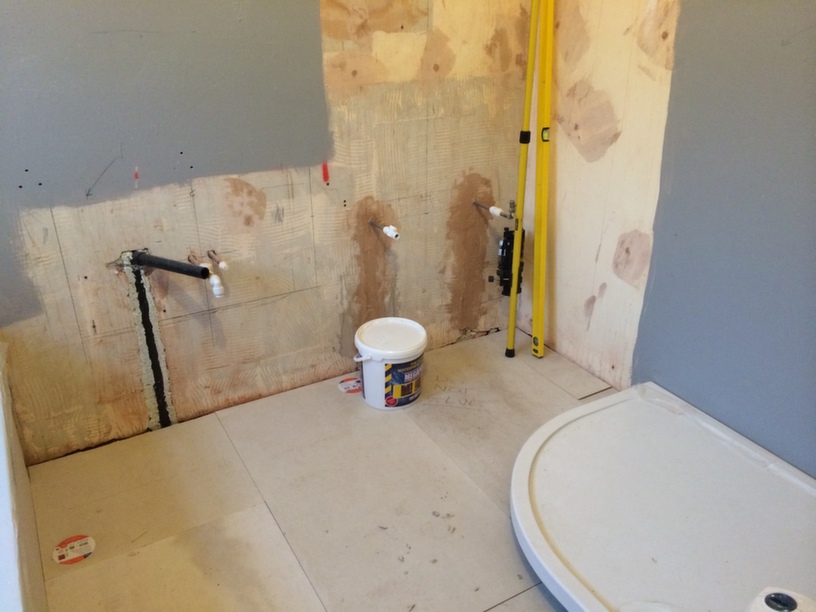
The new layout necessitated boarding up a doorway to fit a shower enclosure.
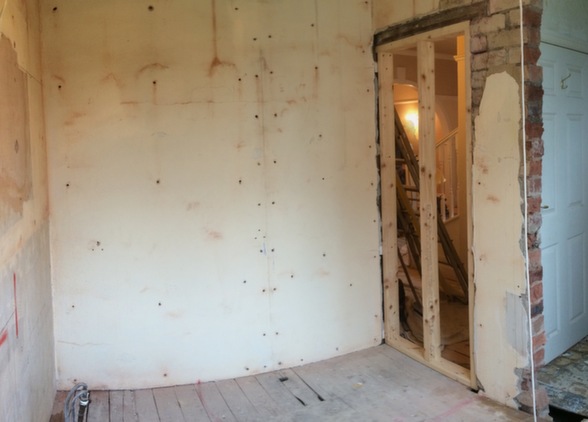
After the existing suite and wall/floor coverings were all removed, the existing doorframe was removed and a stud framework was built and plasterboarded.
You can see that some loose render on the adjacent wall was removed (as you can see the brickwork beneath)
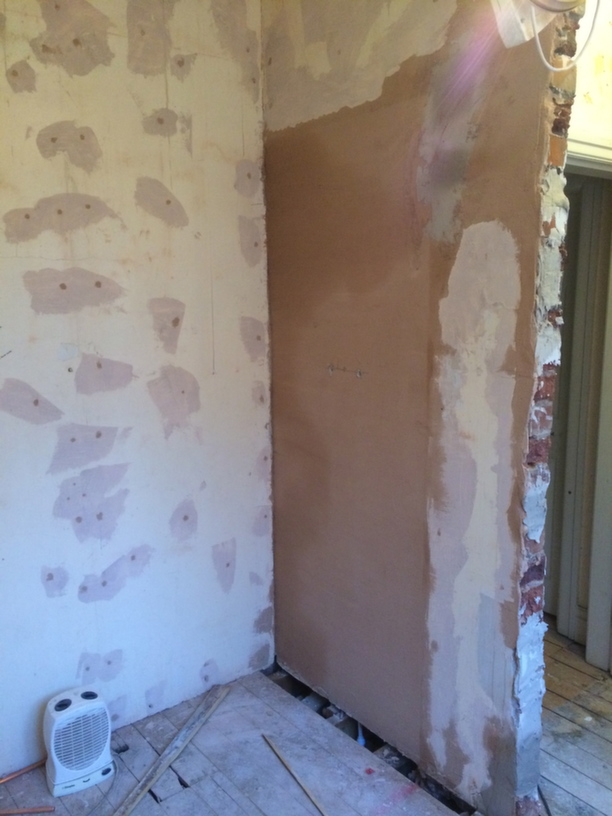
This plasterboard & exposed brickwork was then bonded up to ensure flat walls whilst maintaining a square corner to the room so that the shower tray would fit correctly, ensuring a watertight seal when installed.
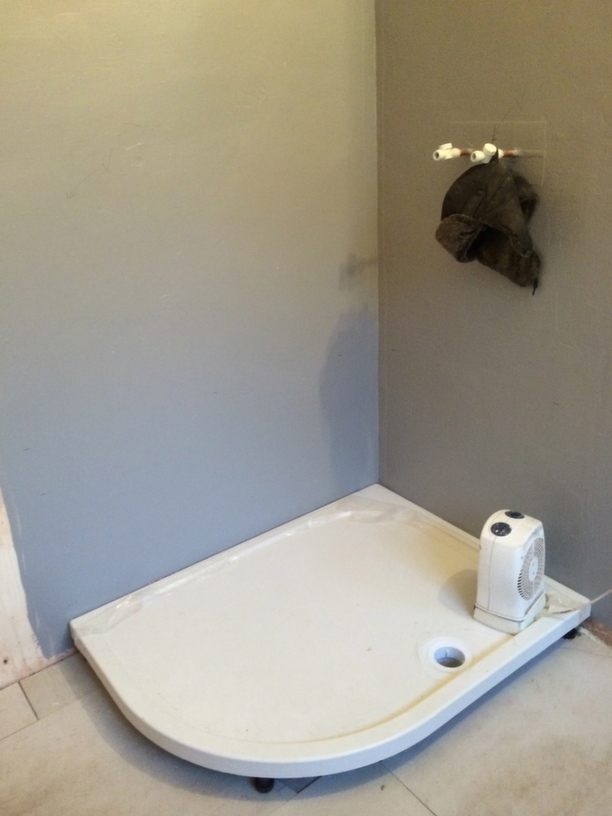
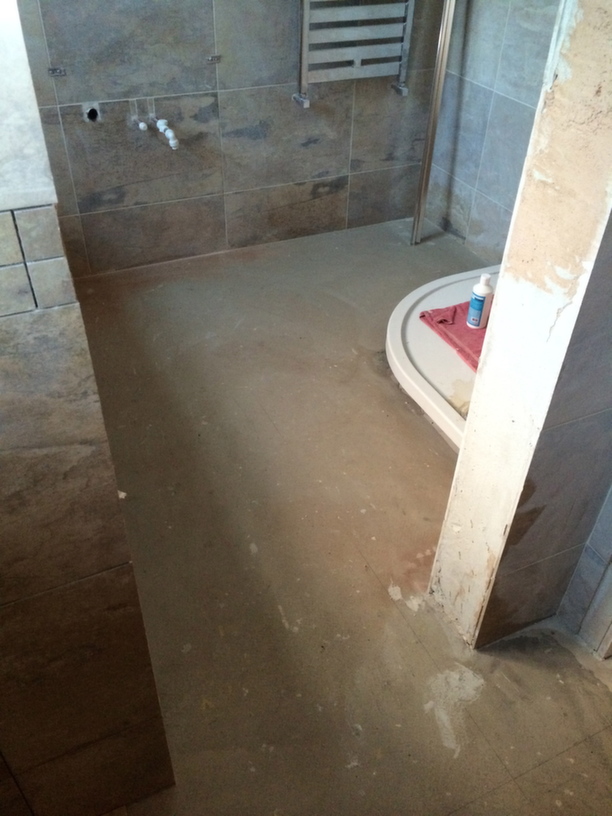
The shower tray was installed and the waste run beneath the floor and the walls were tanked prior to tiling to guarantee a long-lasting tile installation.
The walls of the bathroom were then tiled with porcelain tiles with a mosaic sheet border tile detail
You can see the pipework protruding from the tiles that will feed the shower:
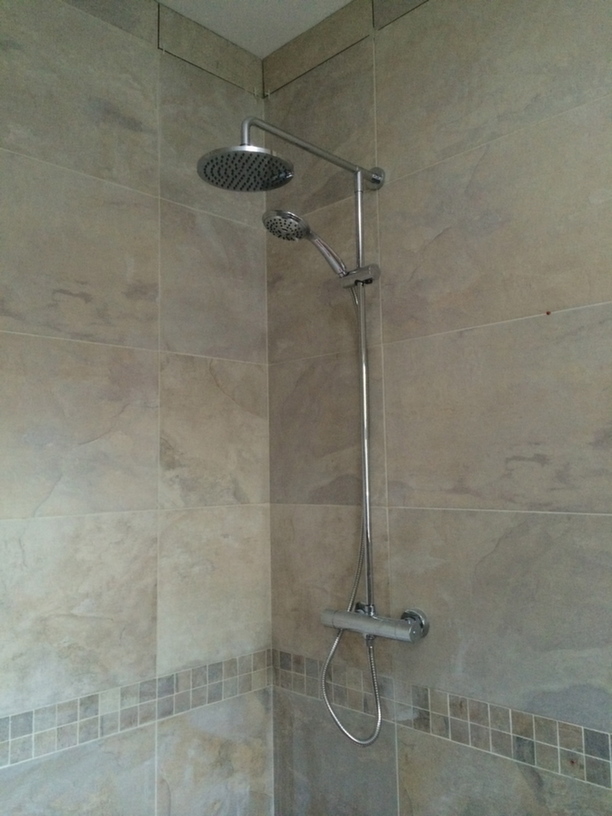
Once the tiling was completed, the shower valve could be installed with the use of a bar mixer shower fixing kit.
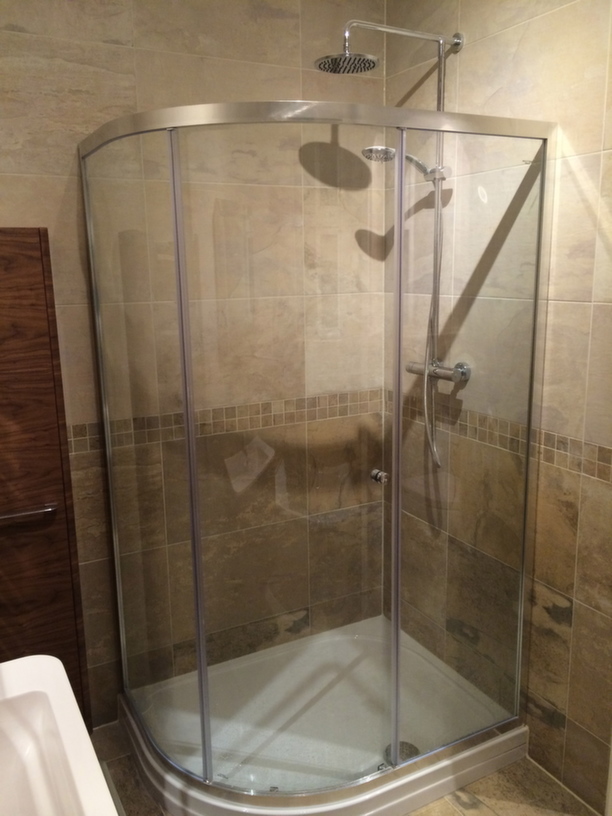
This Simpsons shower enclosure was then fitted, which features a single sliding door, rather than the traditional two.
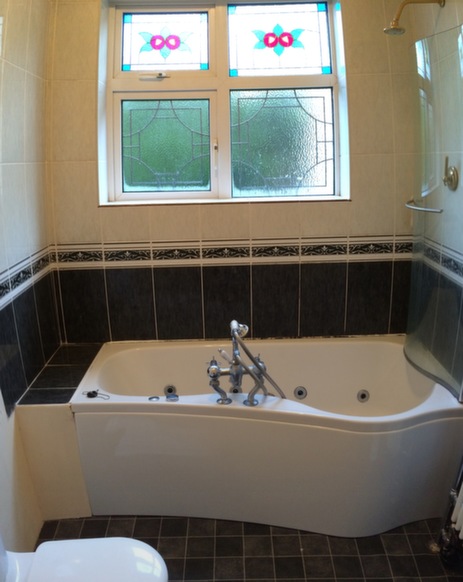
The existing bath was removed and the wall tiles were stripped.
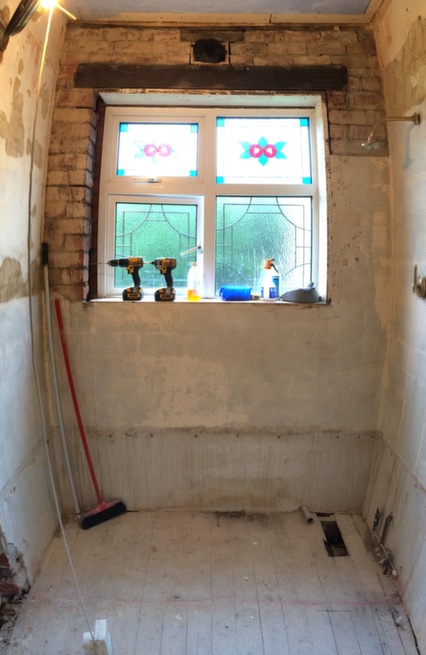
As you can see some render was found to be blown.
These walls were then repaired by reboarding & bonding up where necessary.
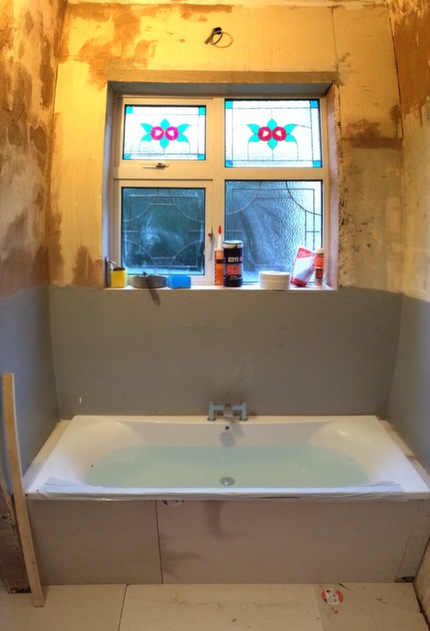
The bath was installed and the waste run & taps were connected.
A wooden frame was built for the bath to support it and form the foundation for the tiled bath panel.
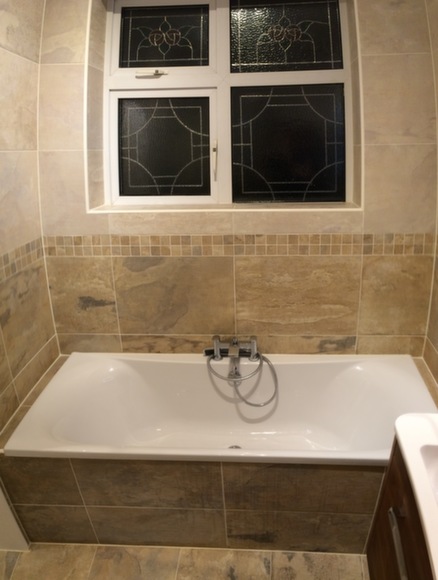
The 190cm long double-ended bath sits centred within the 210cm wide room with a 10cm tiled section either side of it.
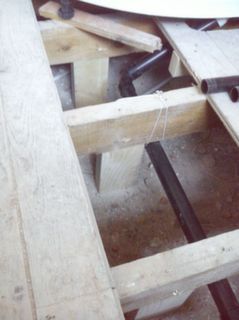
Once the original bathroom was stripped out, the existing floor was made more rigid with less deflection by installing braces in the longest joist spans.
Please see here for more information on strengthening floors prior to tiling.
Once the floorboards had been secured, they were then overboarded with cement tile backer boards.
PS You can see in the picture above the pipework that has been chased into the wall to feed the wall-hung basin & chrome towel radiator.
The floor surface was then levelled using a self-levelling compound, as the two adjoining rooms weren’t level with one another.
This only became apparent when the two rooms were combined by knocking the archway through between them.
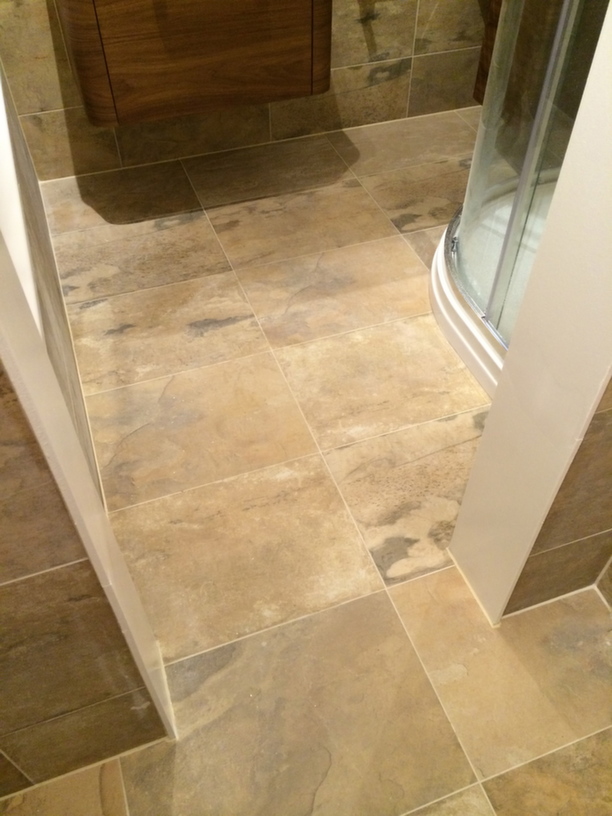
The electric underfloor heating mat was laid and the floor was tiled with porcelain floor tiles.
The tiles were finished with a colour-matched grout & silicone for a truly professional finish
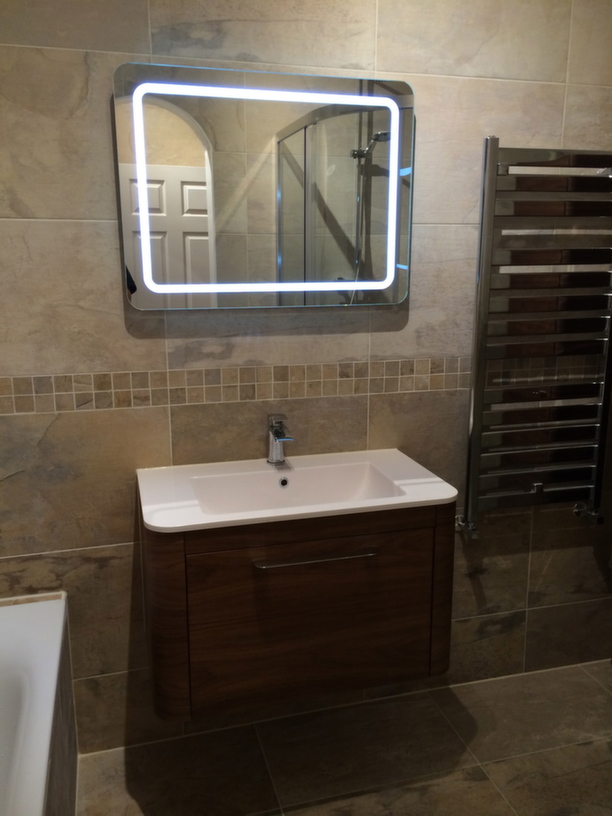
A stylish wall-hung basin & walnut vanity unit was fitted with an attractive LED mirror unit above it.
A chrome towel radiator was fitted to provide additional heating to the room.
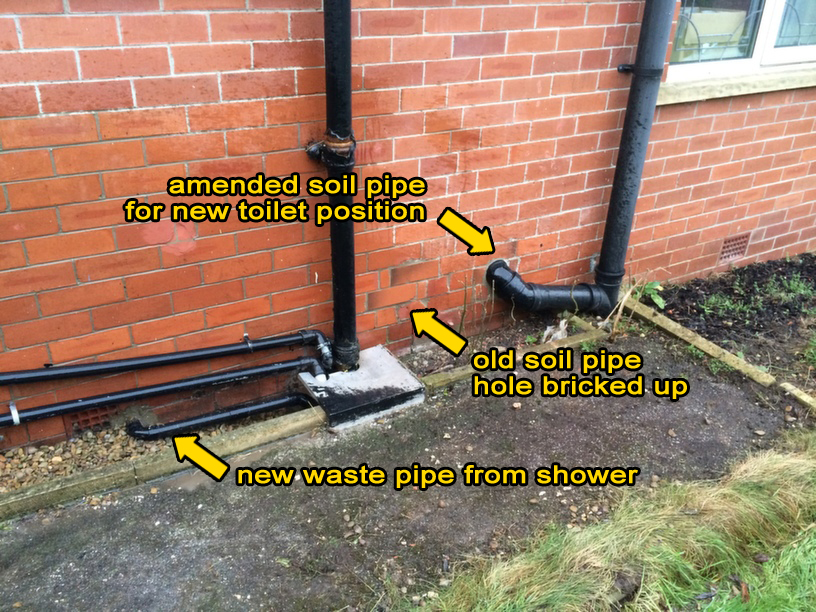
Finishing touches were done such as bricking up outside pipework exiting the bathroom that had changed position. Matching bricks were sourced to disguise the alterations as much as possible.
The transformation was complete
Time taken
2 weeks
How we helped this customer
![]()
- We listened to the customers’ requirements and provided them with a quote for the bathroom suite that would suit their needs from our local supplier, which was beneficial for the customer in a couple of ways:
- Good quality items from a local family-run business.
- Replacements were readily available if damaged in transit etc due to the excellent relationship I have built up with my local supplier. Compare this to some internet-based firms that will haggle and argue over any return and can take weeks and weeks of communication to resolve (and a delayed bathroom installation/time without facilities / living with a building site etc)
- My suppliers’ local showroom offers customers the chance to see suite items (bath, basin etc) ‘in the flesh’ before purchasing.
- We listened to the customers’ tile & flooring requirements and then directed them to our local suppliers’ showroom to complete the purchase.
- We provided a turn-key bathroom installation comprising of bringing together the following trades:
- Labourers for the rip-out
- General builders for knocking a new doorway between the 2 rooms, fitting lintels etc
- Joiner for stud work – old doorway, bath frame & WC cistern frame
- Electrician for the lighting, mechanical extraction, LED mirror & underfloor heating
- Plasterer for the ceiling & walls
- Painter & decorator for the walls & ceiling
- Plumber for fitting the bathroom suite
- Tiler for the wall & floor tiling
All these trades were managed to complete the bathroom in 2 weeks without the customer even having to be on-site as everything was agreed upon (and written down in a highly detailed estimate) beforehand.
We also arranged for the waste disposal via our local skip supplier (in areas where access is limited we have other means of waste removal so don’t worry.)
Summary
I hope you have found this useful, please leave a comment below or get in touch for a free site survey.
Chris