This article explains why you need to tank (or waterproof) the walls around a shower or bath and explains how to do this with an all in one tanking kit.
Why do I need this?
If water gets in behind tiles through….
- cracked or missing grout
- an incomplete / broken silicon seal (normally related to flexing of the bath due to incorrect fitting)
- the grout itself (especially if you have a power shower)
…..and the substrate (wall material) behind the tiles is not waterproof, then it can fail resulting in tiles falling off walls and major remedial work to put everything right. Please see my article water ingress behind tiles for more information.
Do it right 1st time and you will not have to do it twice!
All in one tanking kit
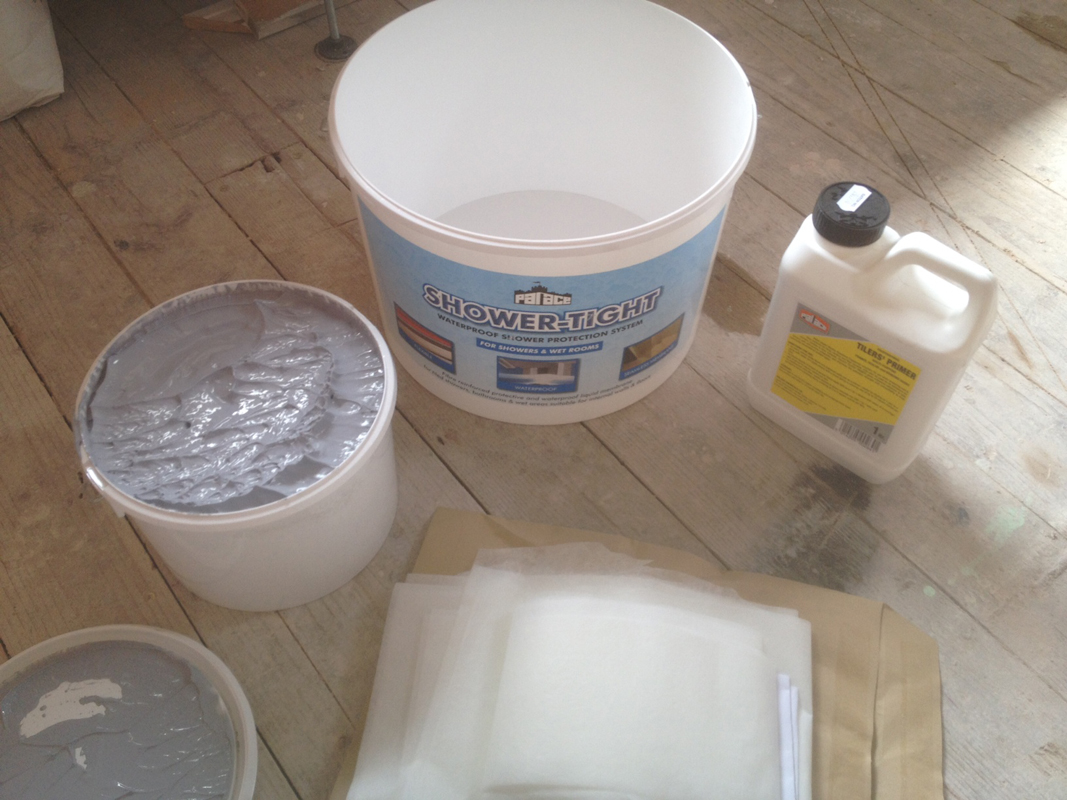
This is a kit that I often use to ensure fully watertight wall surfaces prior to tiling, but there are a number of different manufacturers that make similar kits e.g. Dunlop, Bal, Mapei etc. They all work in a similar way, but I use this one as it includes more tape and I can get slightly cheaper than the other ones.
Essentially it is a waterproof barrier system to protect sensitive substrates in tiled areas such as showers, bathrooms and wet-rooms.
The kit consists of a:
- surface primer
- grey flexible waterproof coating
- super strong polyester matting to reinforce seams in joints around wall floor junctions.
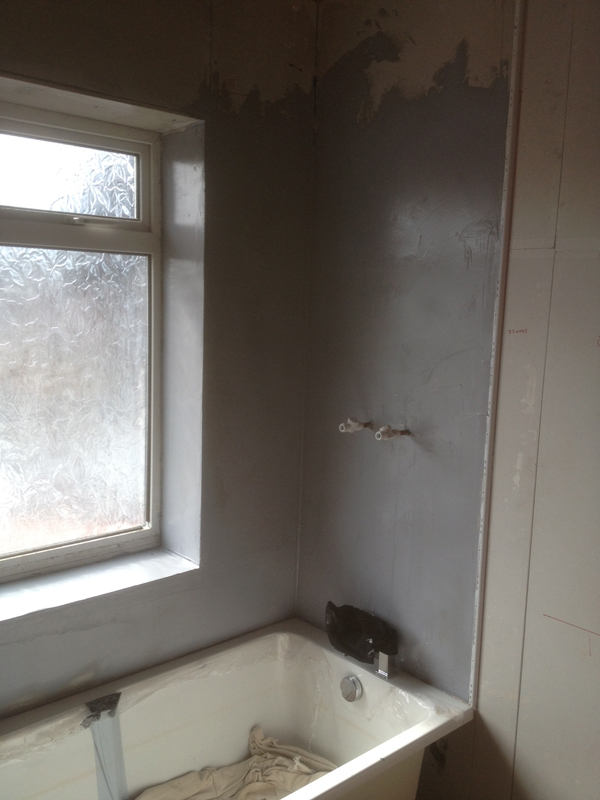
This seamless, protective membrane (i.e. the grey waterproof coating) inhibits the passage of moisture from within the tiled area through to surfaces and structures which may be sensitive to the effects of prolonged water migration beneath – in the example below standard plasterboard.
Please see my article on Preparing walls for tiling – re-boarding for more information on wall surface preparation which covers the different options available to you and my recommendations.
Why tank?
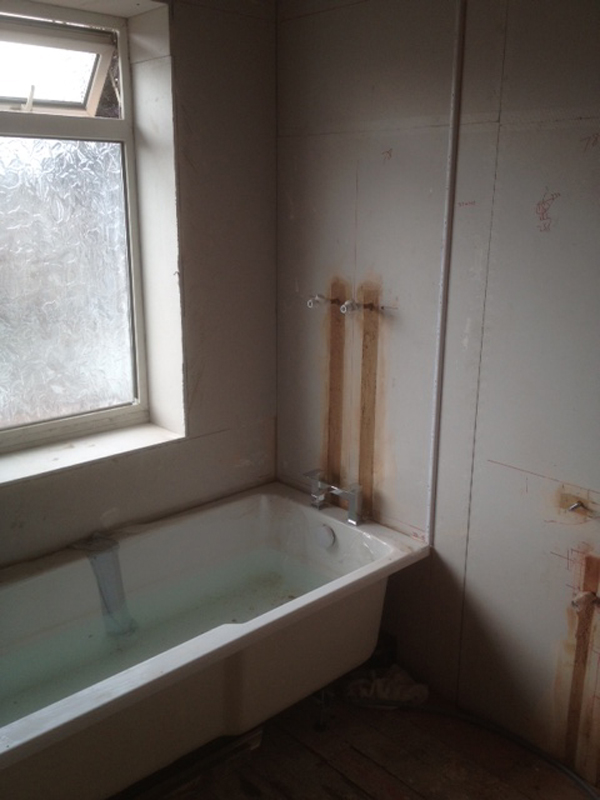
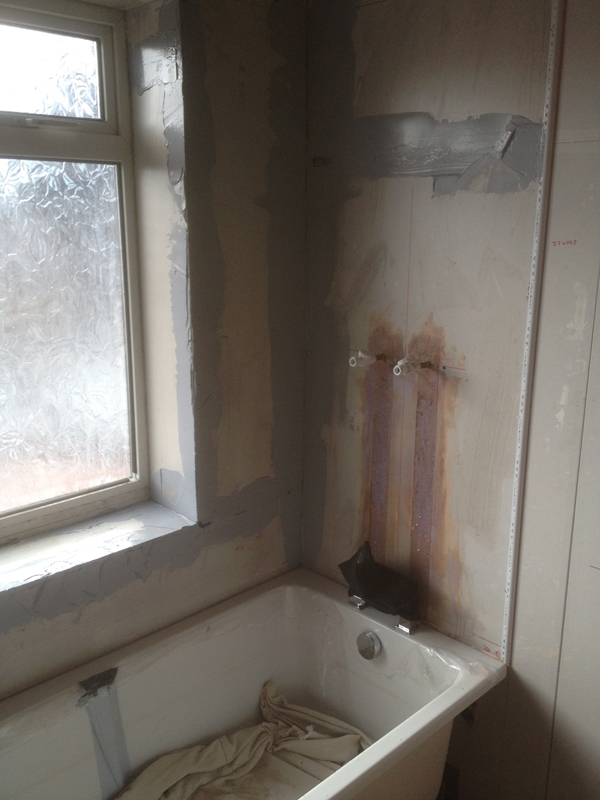
In this bathroom (done by me in Leeds) I have chosen to use a standard plasterboard to board out the walls with, combined with a tanking kit for the area around the bath. Moisture resistant plasterboard is better but more expensive, and in this instance, the homeowner was on a tight budget so compromises had to be made.
Using regular plasterboard allows for lower re-boarding costs (when compared to using other tile backer boards) whilst ensuring the wet areas are adequately prepared to resist any potential water penetration behind the tiles.
When to tank?
After the 1st fix plumbing work & re-boarding has been done and before the wall tiling.
When to tank?
All wall areas that are in the wettest area – in this instance around the bath below the shower.
Surface preparation
- Surfaces to be coated must be clean, dry, free from oil, grease and any other contaminants.
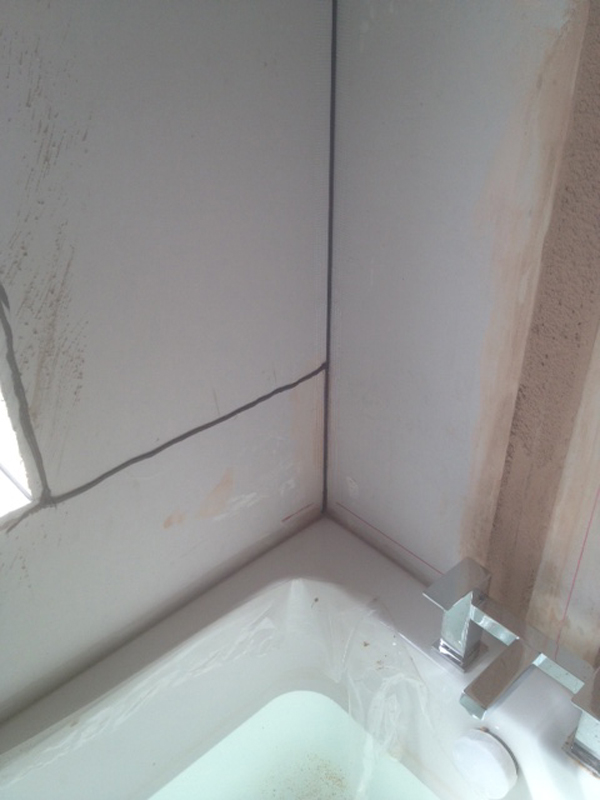
- All gaps or joints in the plasterboard must be filled with sanitary silicon sealant (colour not important – done in black here so it can be seen)
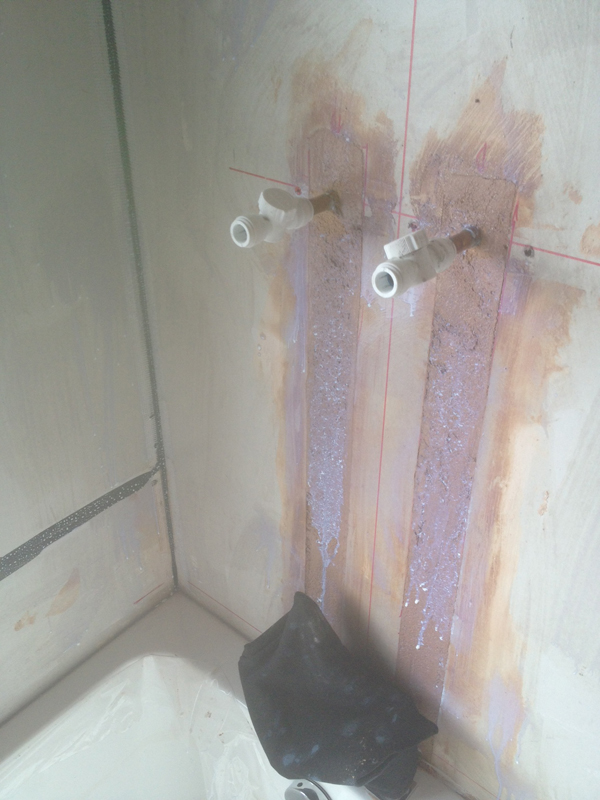
- When the wet-zone area is structurally sound with no movement (due to correct fixing of the boards) all surfaces are primed with a single coat of primer (with a large paint brush) which is then allowed to dry (approx 1 hour).
Tips of the trade
Leave the protective film of the bath on and cover the taps at this point.Clear up any drips onto the bath / taps immediately as this primer is very hard to remove once it has dried.
Application
Tips of the trade
Wear rubber gloves for the next stage.
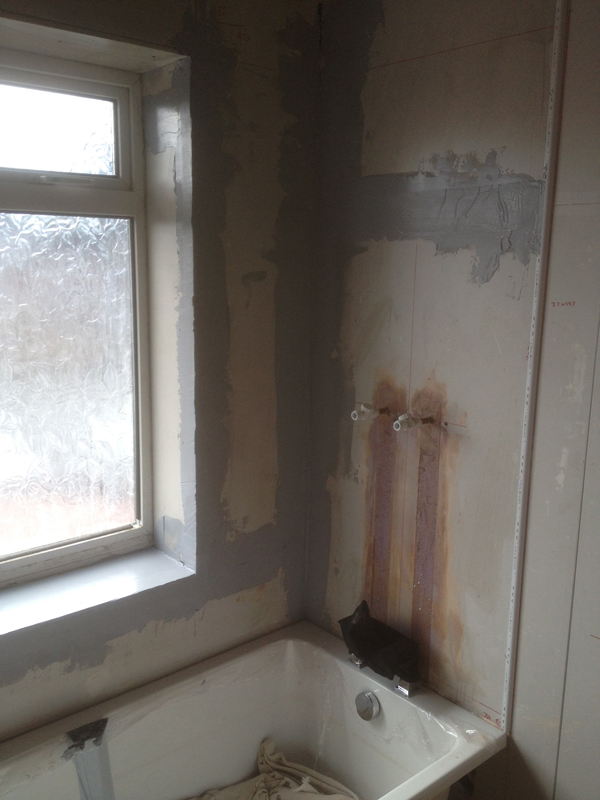
Generously apply the grey waterproof coating (with a brush, roller or float) around all horizontal and vertical joints, corners, cracks and seams and at the joints surrounding pipe penetrations. I find a float is best to ensure adequate coverage, but you can use 2 x coats if applied with a brush (which you will definitely need to throw away afterwards).
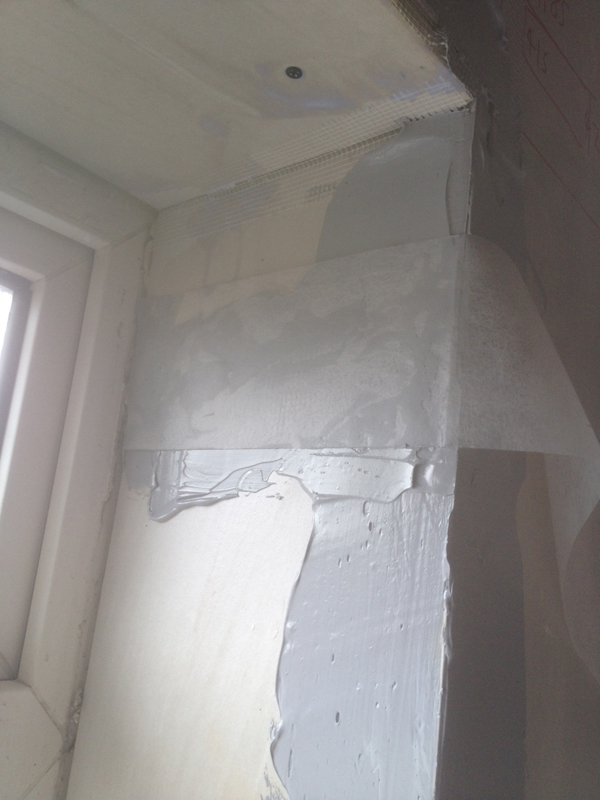
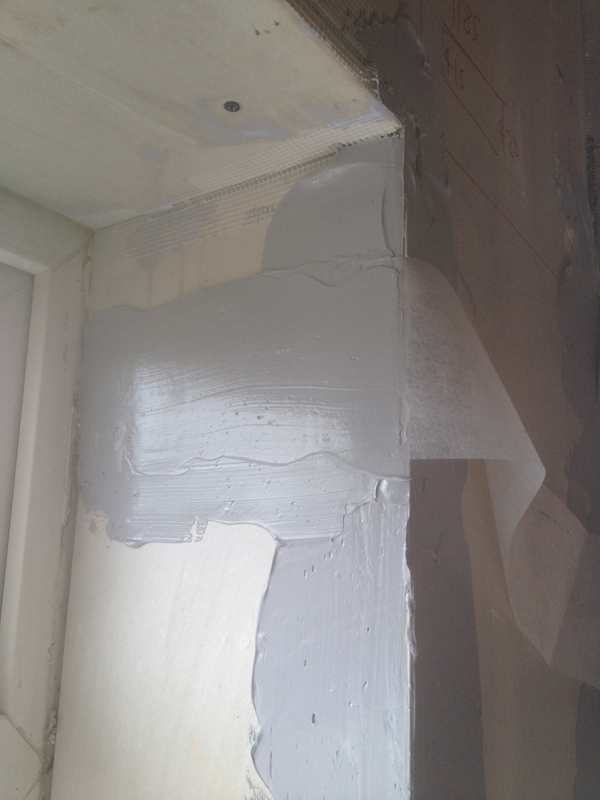
Cut lengths of the polyester tape with a pair of scissors to the correct size, and whilst the coating is still wet, press in the tape along the internal corner, surface joints or at the junction between different surface materials.
If you are not wearing gloves by now, you’ll wish you were.
To ensure all joints and edge seams are sufficiently sealed with tape, apply another layer of the grey waterproof coating where necessary to seal the tape, ensuring that the tape lays perfectly flat.
If the tape is not flat at this point, the waterproof coating will dry and harden, making it impossible to flatten later. This will make tiling difficult, so spend some time getting it right 1st time.
PS
Some all in one tanking kits come with a self adhesive tape which is stuck into the corners and over joints with a seam roller before applying any of the waterproof coating. I find these a bit more difficult and fiddly and the adhesive tape is often a lot thicker than the kind supplied with this kit.
After you have applied a 2nd coat to all of the tape, use a brush or trowel to apply an even and consistent coating over the rest of the area required. Be sure not to leave any ridges or high points if you are using a float, as this will also make tiling more difficult.
Allow 24 hours for the waterproof coating to dry out, then you are ready to mark out for your tiles and begin tiling the walls.
At this stage, you may wish to apply another layer of the waterproof coating (normally at 90º to the 1st layer) if the 1st layer has failed to achieve sufficient coverage.
Personally, I find that using a trowel rather than a brush or roller allows me to do it in 1 coat, thus saving time waiting for it to dry out twice.
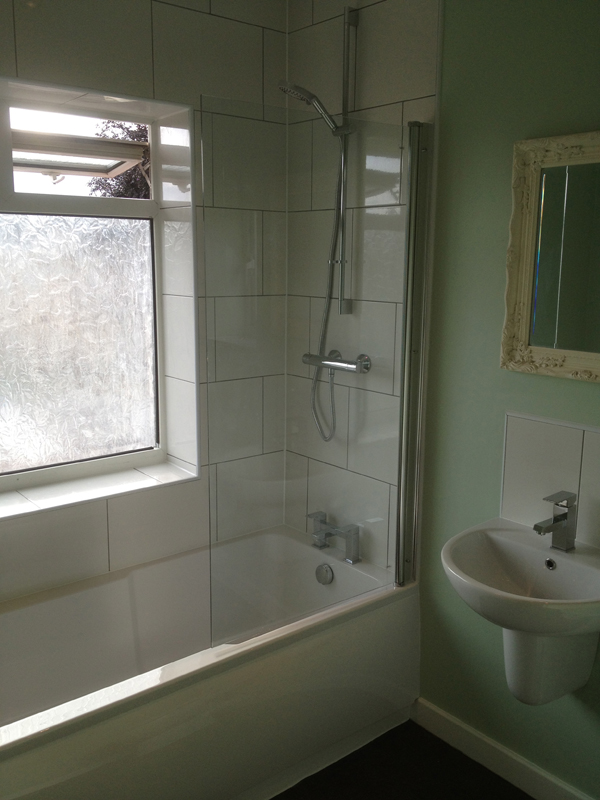
This is the result after tiling and grouting and 2nd fix plumbing has been completed.
Related articles:
How to fit bar mixer shower pipework
Fitting a bar mixer shower with a Mira kit
Conclusion
Using an all in one tanking kit is easy and cheap to do (the kit is around £50) and an area such as this one can be done in under an hour.
It can then be tiled the next day, using a polymer modified cement based adhesive.
If using a tubbed adhesive, walls sealed with this tanking kit should be treated as impermeable and a suitable drying time should therefore be allowed before grouting, which may be several days.
Let me know how you get on.
Chris
PS
There are other tanking methods available which I will be writing about in another article.

