This article shows how to tile a shower enclosure once the shower tray has been fitted.All work carried out by ukbathroomguru.com.
Introduction
When half tiling a bathroom rather than fully tiling all the walls, you may have to tile the shower enclosure. This article will show you how.
The basic ordering of tiling a shower enclosure (within the bathroom installation as a whole) is as follows:
- Run pipework within wall to shower valve as required
- Prepare walls for tiling
- Fit shower tray & connect up waste
- Tank tiled area (our starting point in this article)
- Tile & grout
- Silicon seal where required
- Fit shower valve & glass enclosure
Process
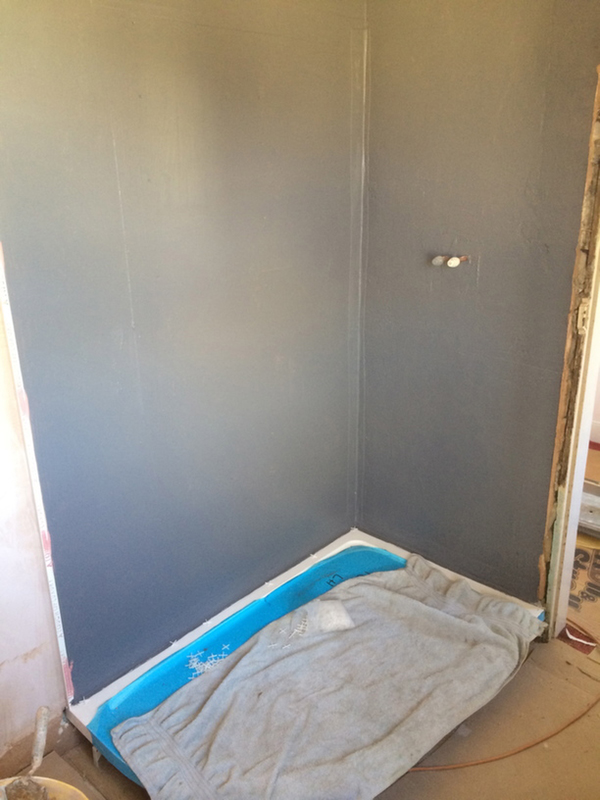
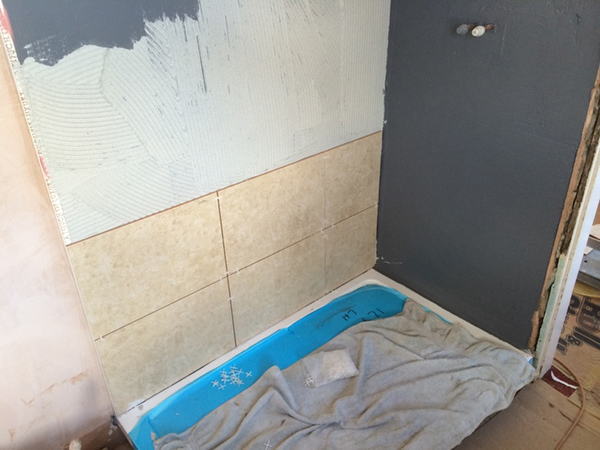
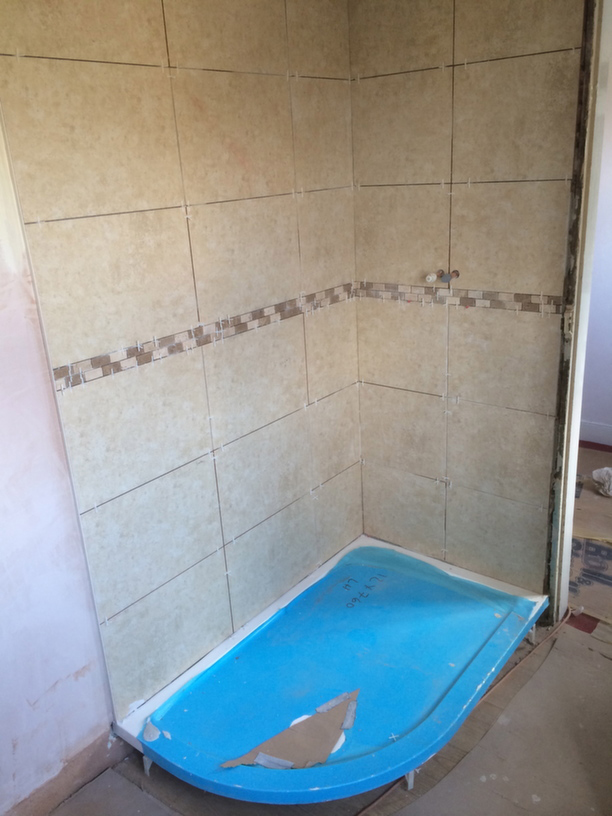
The shower tray has been fitted into place, the waste connected & tested and all necessary tanking has been done.
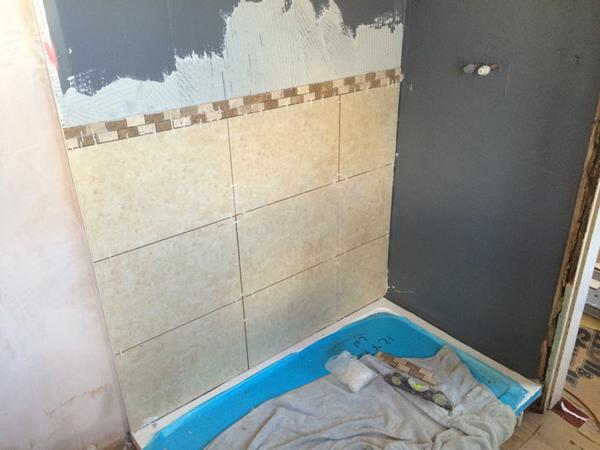
The tile trims have been glued to the walls (perfectly vertical) so that the tiled area that they delineate will extend just beyond the glass enclosure.
These trims have been skimmed up to (outside the tiled area) but the area within the shower was not skimmed prior to tanking / tiling.
This is an alternative approach to plastering the whole wall and then tanking & tiling over part of it, and it has a couple of benefits:
Quicker
Tiling & plastering can be done simultaneously, rather than waiting a recommended minimum of 4 weeks for fresh plaster to dry out prior to tiling on top of it.
Better tile adhesion
Bare plasterboard can carry tiles of up to 32Kg/m2 rather than 20kg/m2 for tiles onto plaster, meaning that you can fit a greater range of tiles, including larger, thicker, heavier tiles.
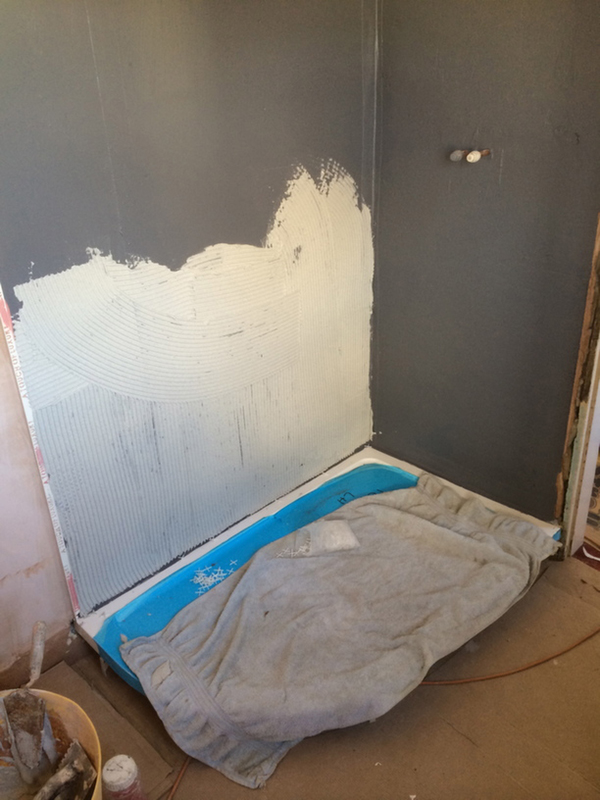
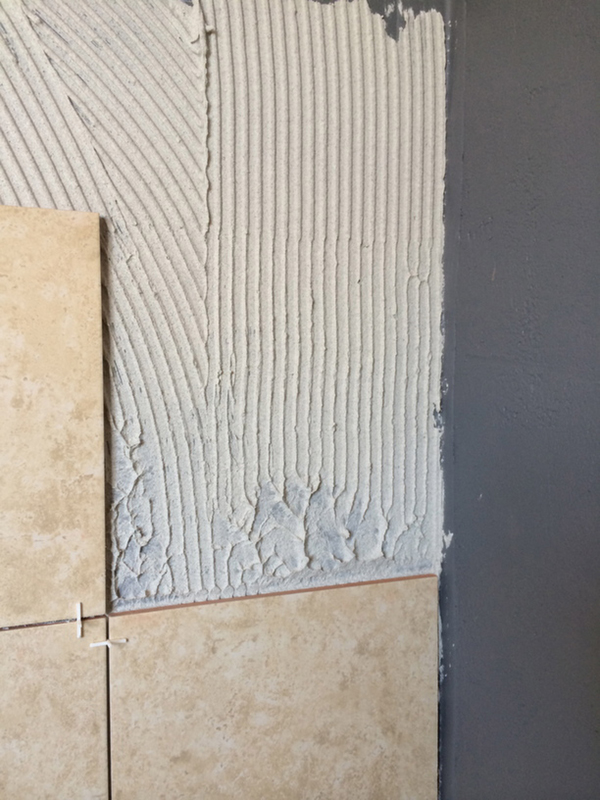
A flexible, cementious (slow setting in this example) tile adhesive is applied to the wall using a notched trowel over a small, workable area.
PS: Before mixing any tile adhesive, the tile layout is worked out and the position of the border tiles is noted.In this example we can tile directly off the shower tray (with a 2mm spacer between the underside of the tray & the tray to allow us a bit of adjustment) as we know it is perfectly level (because we installed it) and this will rather fortuitously give us a nice sized cut at the ceiling.
With regards to the vertical alignment of the tiles we choose to start with a full tile off the left hand trim and centre the grout line on the adjacent wall in the centre of the shower valve (which itself is centred within the enclosure.)
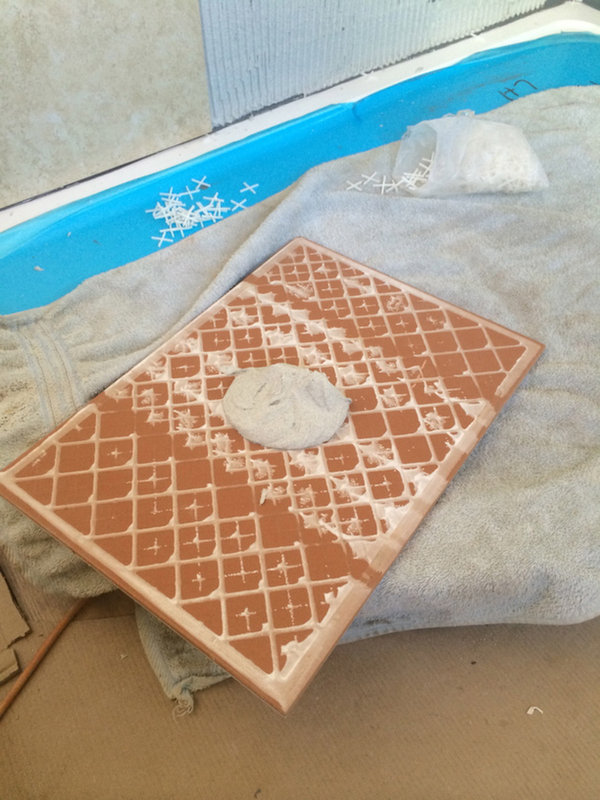
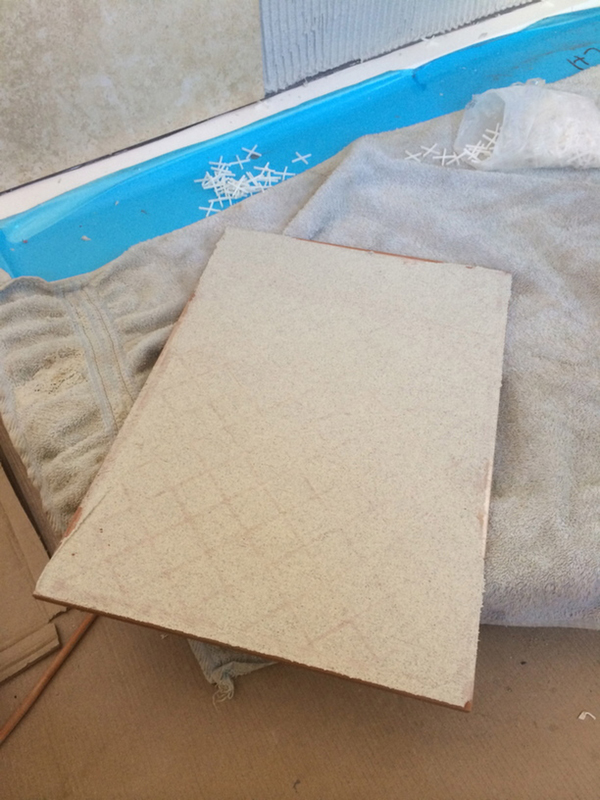
The tiles are then back buttered before fixing to try and ensure 100% coverage once they are pressed into the wall with a twisting action. 90% coverage is the absolute minimum for wet areas.
This is a belt and braces approach (sometimes called the Tarver method) is not always shown in how to tile videos where adhesive is only spread over either the wall or the tile with a notched trowel. This approach ensures better coverage, and is particularly important when installing large format tiles or when the wall is not completely level and flat.
This will help guarantee the longevity of the installation as it helps to improve the tiles ability to resist dislodgement and also increases its chance to resist damage.
The bottom row of tiles are then fitted one at a time starting from the tile trim and finishing with cutting the final tile into the corner.
2mm plastic tile spacers are used to space the tiles an equal distance apart at all junctions.
Once the 1st row is on and levelled, the next can be started.
Tiles are aligned with the tile trim, ensuring a neat, flush finish.
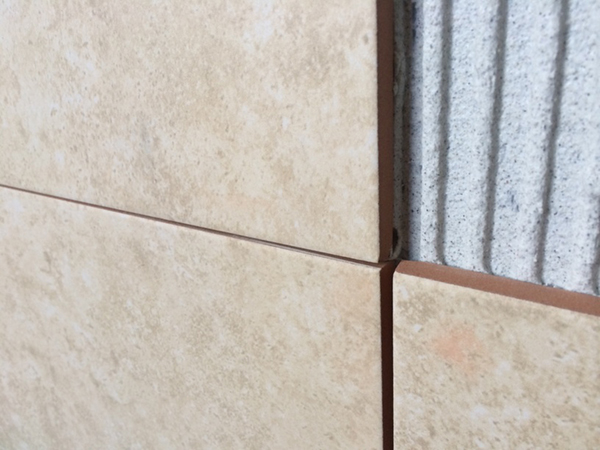

Care is taken to ensure there is no lipping at the tile edges and the easiest way to do this manually is to put the spacers in after you’ve ensured the surfaces of adjoining tiles is flush as shown above.
This is easier to do when the tile edges are touching as it is easier to see & feel any lipping by running your hand over the joint.
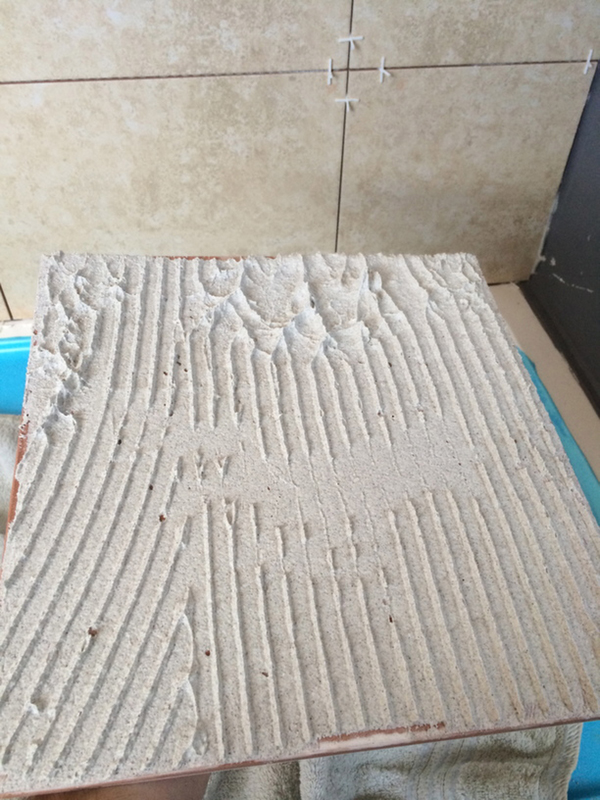
Periodically tile adhesive coverage is checked by removing a tile and adding additional adhesive if required (as above) to ensure 100% coverage is attained whenever possible (i.e. a solid bed of adhesive with no air voids) for the reasons listed above.
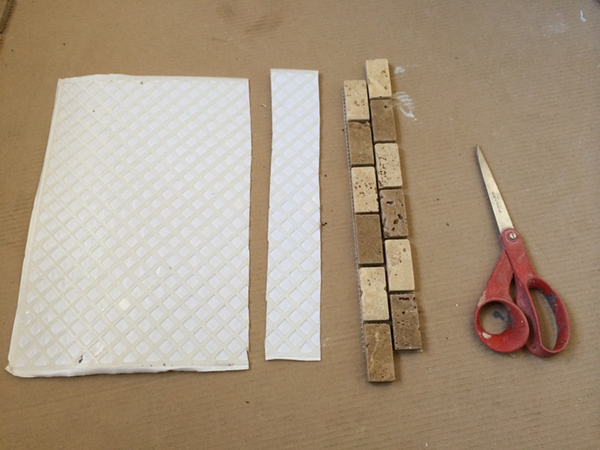

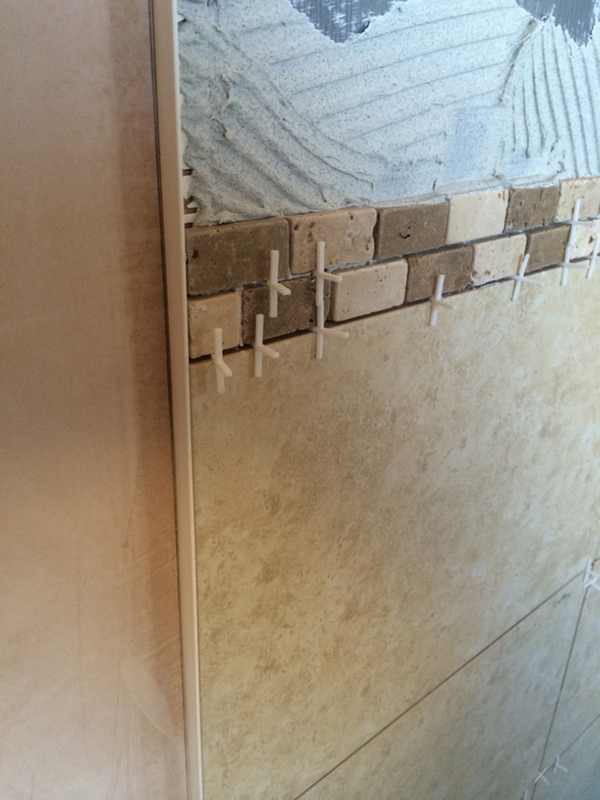
Adding (self adhesive) mosaic mesh to the backs of the stone mosaics helps to keep them rigid and makes tiling (particularly grouting) quicker & easier as the adhesive is less likely to squeeze through the grout lines, requiring extensive cleaning.
It also makes it easier to get the mosaics flat.
PS These stone mosaics are sealed prior to tiling to ensure that they are not stained by the adhesive or grout, and to ensure they do not discolour over time by absorbing dirt.
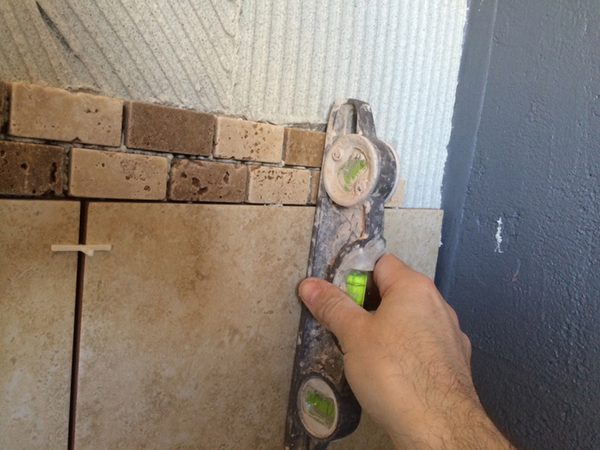
Border tiles are levelled off the wall tiles below using a short spirit level (which themselves should be plumb) and then spacers are added.
Adhesive is only spread on the walls that are to be immediately tiled to avoid the adhesive going off before the tiles are applied.
Rapid set adhesive is less forgiving in this regards, particularly in the summer when temperatures are higher and setting times are reduced. This is why I often use standard setting adhesive.
The process is repeated going up one wall until the ceiling is reached, and then the remaining wall is tiled from the bottom up.
Holes are cut in the tiles using a diamond drill bit as detailed here.
The tile adhesive is left to dry and then the area is grouted with a flexible, water resistant ivory coloured grout in this instance.
The floor & wall junctions are then filled with a colour co-ordinated silicone sealant to ensure a watertight installation.
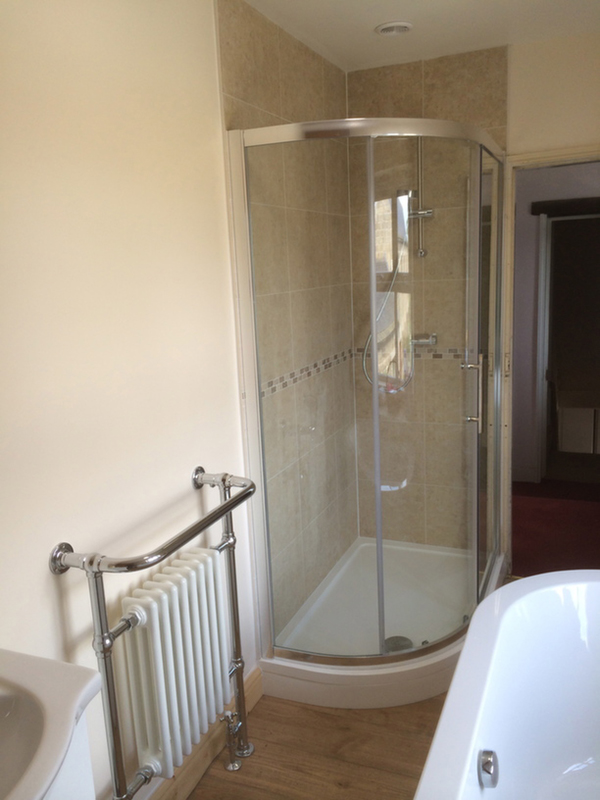
Finally the shower valve & shower enclosure is fitted.
Other information
I choose to use a cement based, polymer modified flexible adhesive which comes as a powder that needs to be mixed with water. I generally use a standard setting (rather than rapid set) variant to give me a decent working time so I don’t have to rush too much. These adhesives give the best result.
PS Tubbed & ready to use (dispersion) adhesives should generally be avoided in my opinion as they are not well suited to impermeable (tanked) surfaces, large format tiles or walls where the adhesive may need to be quite thick to take up any unevenness.
Epoxy adhesives are generally not needed in domestic situations other than wet rooms.
I use a water resistant flexible grout and a colour co-ordinated sanitary silicon sealant with anti – mould properties to finish off the tiling job.
Timescales
This area can easily be tiled in a morning, with the only difficulty being the mosaic border tiles, as they are a bit more fiddly. Grouting and siliconing can be done in another morning.
Costs
This tiled area is approximately £6m2 so you would expect to pay around £300 all in for this – tiles, adhesive, grout, silicon etc (estimated at £30/m2 for labour and adhesive etc + £20/m2 tiles).
Summary
I hope you have found this useful, leave a comment below if you have any questions or queries.
Chris