This article shows you how to fit a thermostatic mixer shower with a simple bracket that can be installed at 1st fix plumbing i.e. Before tiling.
Introduction
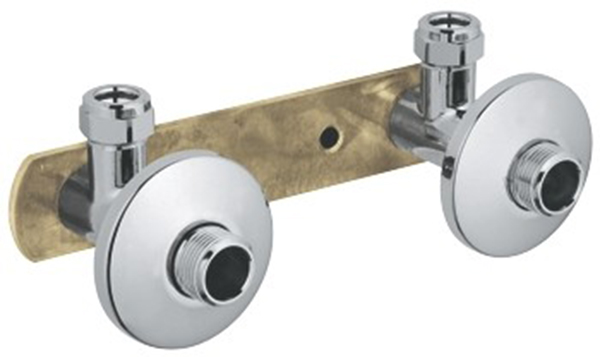
This product (and those like it) allows you to fix all the necessary pipework for any standard bar mixer shower valve (with 150 mm centres) at 1st fix stage.
After tiling, all you need to do is screw on the shower valve to the exposed threads.
There are a couple of variations but all have the same basic features:
- a backplate that you screw to the wall for strength.
- 2 x 15mm inlets for the hot & cold water supplies into the valve (may be compression or push fit and face up or down depending on where the supply pipes come from).
- 2 ¾” male threaded outlets at 150mm centres (which you screw the shower valve onto).
- chrome cover caps to hide the point at which these threaded outlets stick out of the wall.
For:
- Allows all pipework to be fitted at 1st fix stage making 2nd fix very easy to do with minimal tools (only a spanner).
- Provides a very secure fitting for your shower valve as it attaches it securely to the wall.
- Strong metal construction.
- Ensures perfect aligned (150mm centres) pipework so you know the shower valve will screw straight on at 2nd fix (some 2nd fix shower fitting kits rely on very accurate 1st fixing of pipework, and if the pipe centres are slightly out, then the shower valve will not attach.
- Simple, straightforward design without lots of little fiddly bits to get lost.
- Around £30+
- An easy levelling adjustment was made when screwing the bracket to the wall initially with the use of a small spirit level.
- Suitable for most stud wall installations, or where a wall needs to be studded out regardless of the shower fixing method e.g. in this case study where the whole wall was studded out to conceal waste pipes etc.
Against:
- Care needs to be taken at 1st fix the plumbing to ensure that the bracket is set at the correct depth with the male threads protruding far enough out of the wall to allow the shower valve to screw on correctly (see below).
- Not suitable for solid wall installations unless the wall can be studded out as below:
Fitting process
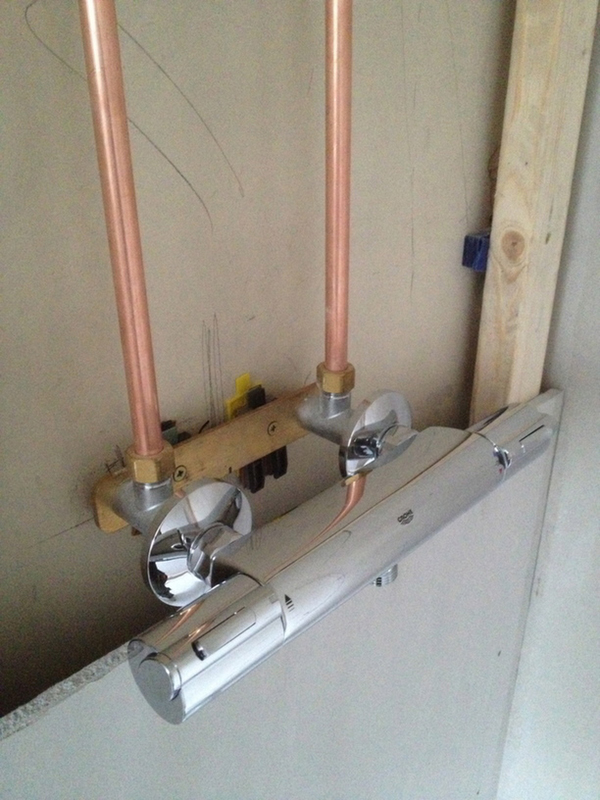
Unlike 2nd fix shower fitting kits such as this, this, and this bracket is installed at 1st fix (before tiling).
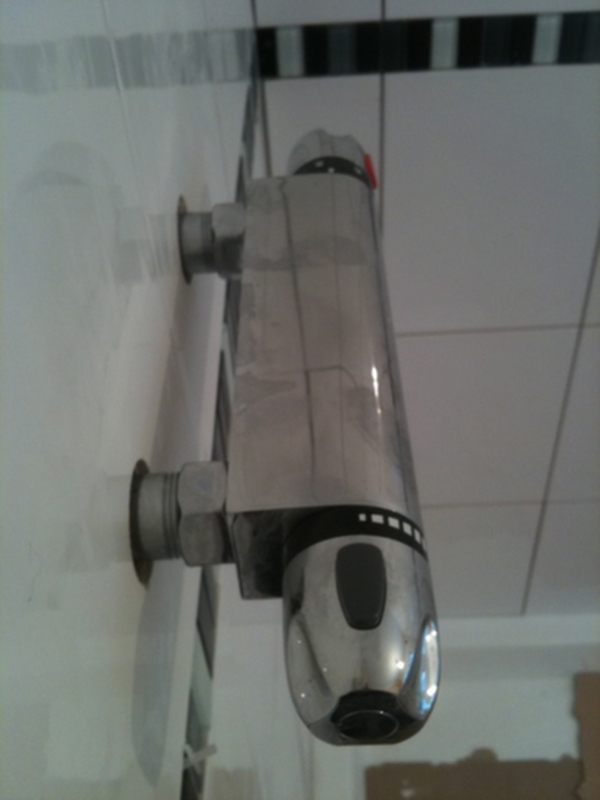
The main body of the bracket and the supply (hot & cold) pipes that feed it are positioned behind the finished wall surface as can be seen above.
This particular model is made of metal so is very sturdy (some are plastic like this one).
The male ¾” threads that the shower valve attaches onto are also metal, so there is no chance of the threads stripping – as can occur when the metal thread of the shower valve is overtightened onto the plastic thread of some of these brackets.
The hot and cold connections are made with a compression fitting with this particular bracket and these connections must be thoroughly checked for leaks before the pipework is entombed behind the shower wall. This is done by putting the valve under pressure by turning the water on and capping the shower end of the bracket (done by stop caps as above or with the shower valve itself.
PS Please see here for a push-fit version of the same valve.
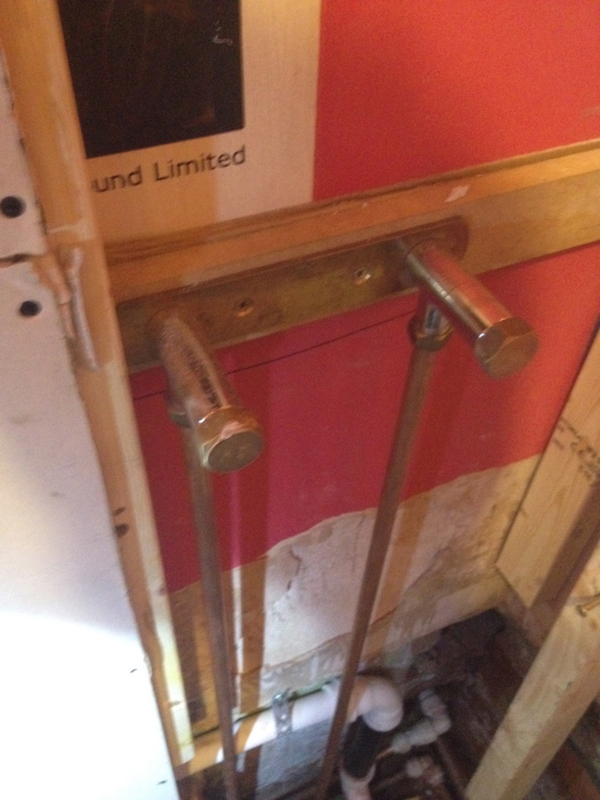
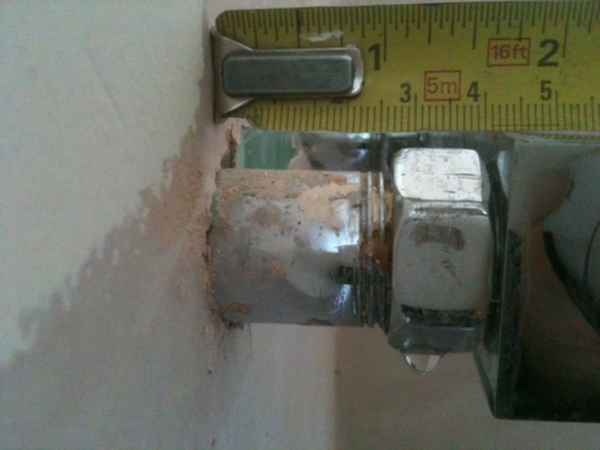
It is vital to ensure that the bracket is positioned square to the finished wall surface, level & set back from the tiled surface by an appropriate amount (see the box below for why).
In the picture above you can see that I have attached a piece of wood to the wall behind the bracket in order to set it at the correct depth.
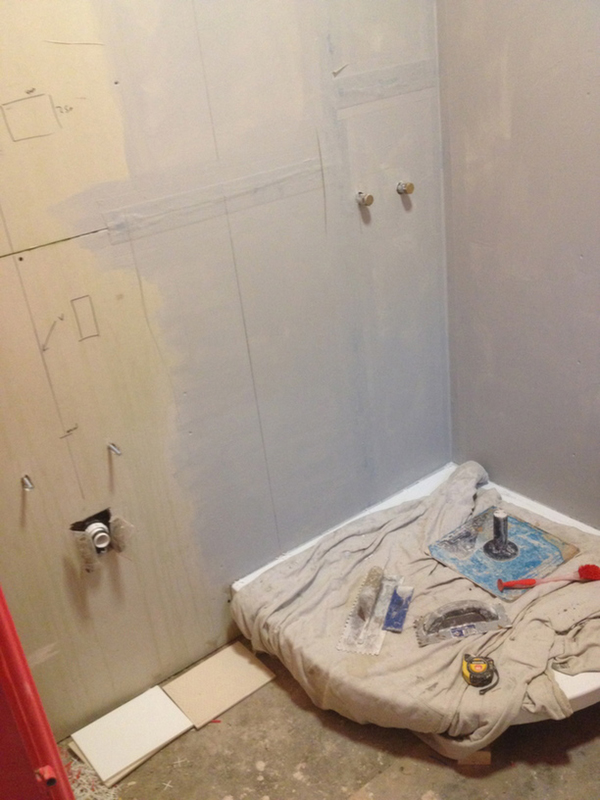
The bathroom wall is then boarded and tanked prior to tiling.
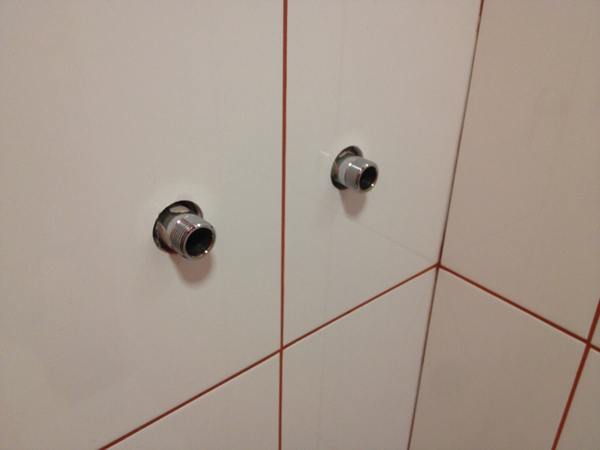
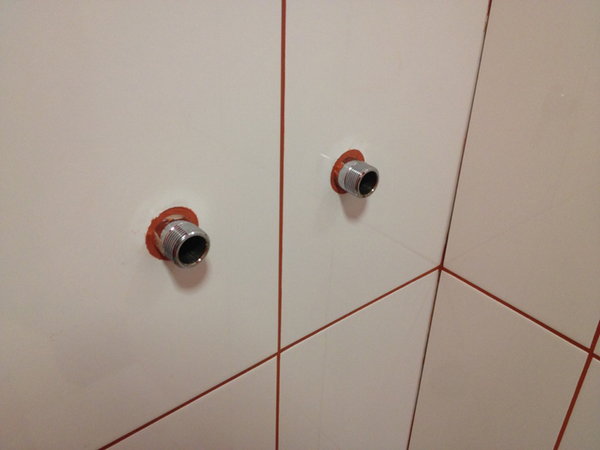
Once the wall is tiled and grouted, the 2 x ¾” male threads of the bracket will protrude through the tiles as shown above.
PS See here for how to cut the holes in the tiles for this.
Setting the depth of the bracket – WARNING
At this stage, it is vitally important that the threads protrude far enough out beyond the surface of the tiles so that the chrome cover caps and the shower valve can be screwed on and nipped up tight before bottoming out – though if they don’t by now it’s a bit late! If the valve is set too far forward it is not the end of the world as the threads may be a bit on show, but if it is set too far back into the wall, then the shower valve may collide with the chrome collars before it has tightened up sufficiently to form a watertight seal. This will make it constantly leak unless you forego the chrome collars.
Initially, this bracket was set too far back in the wall i.e. the 2 x ¾” male threads didn’t protrude beyond the tiles far enough.
This is the biggest threat when fixing this kind of bracket as you have to estimate the thickness of the wall boards, tiles & adhesive all in advance.
Therefore there was not enough space for the shower valve and the chrome collars initially.
This was remedied by adding an extra washer into the shower valve (so that it didn’t screw onto the 2 x ¾” male threads as much) which allowed room for the chrome collars to fit between the valve nuts and the tiles behind.
Of course, there’s nothing (other than aesthetics) to stop you from leaving the chrome collars off completely and merely silicon sealing around the 2 x ¾” male threads.
PS The best way to adjust the ‘depth’ position of the bracket is with the use of plastic packers which allow for very small adjustments. Careful fitting ensures that the bracket is positioned squarely to the finished wall surface, with the 2 x ¾” male threads protruding horizontally from the wall at a sufficient distance.

Back to the case study…..
If the bracket position is OK then the holes around the male threads are filled with silicon sealant to form a waterproof barrier to the wall behind the tiles.
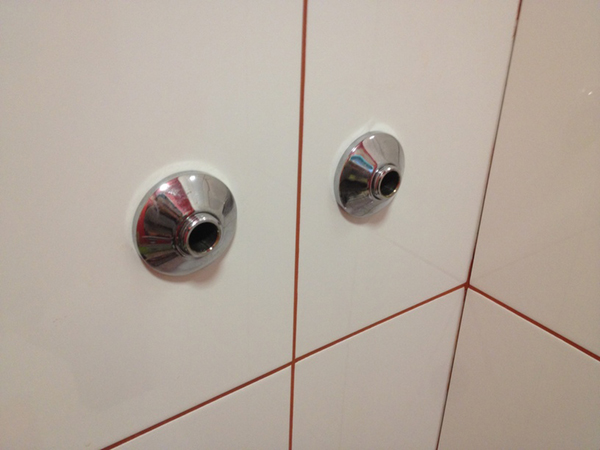
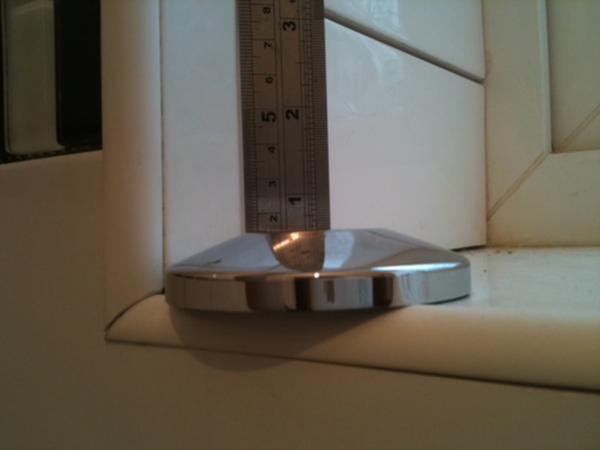
The chrome collars are then screwed onto the exposed threads until they hit the tiles – their only purpose is to hide the unsightly point at which the male threads penetrate the wall.
In other words, they do not stop water from penetrating in behind them so don’t skip the silicon step above to mitigate against the risks of water penetration behind the tiles.
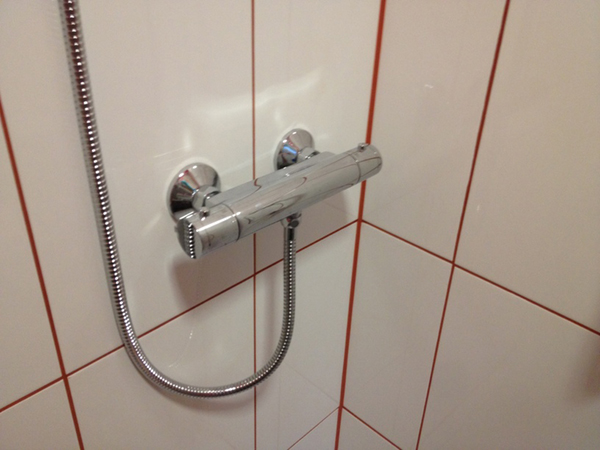
The water supply is turned off, and the shower valve is screwed onto the exposed threads with a spanner, and a rubber washer forms a watertight seal. Be careful with the spanner on the chrome so as not to scratch it.
PS Before attaching the shower valve, make sure that the pipework is thoroughly flushed through to stop any flux or solder from clogging up the filters in the new shower valve.
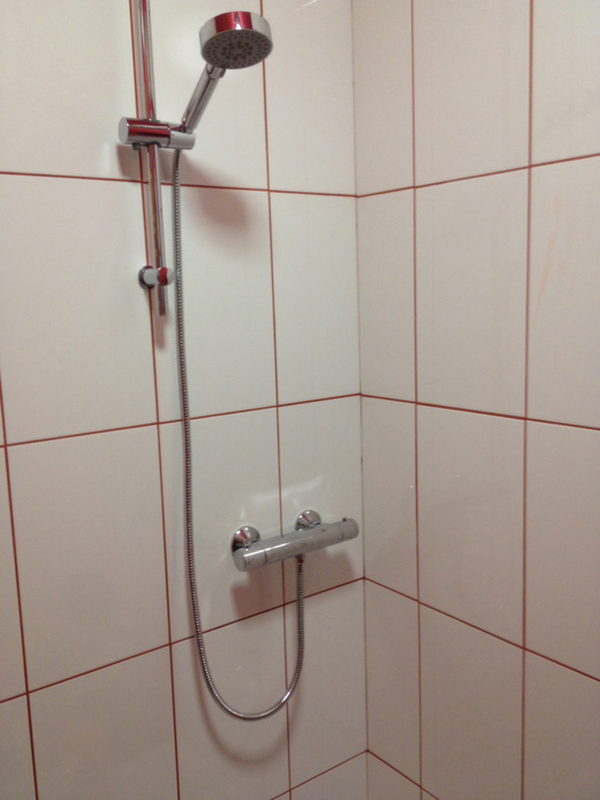
Once the shower valve is attached to the bracket, screw the shower head onto the hose and then the other end of the hose onto the underside of the shower valve (one end of the hose is usually tapered to fit in the hose holder that attaches to the riser rail.)
Attach the (now connected) shower head to the riser rail and then mark the position on the wall where you want the riser rail to go, taking the height of the intended users into account.
Doing the work this way round will ensure that you don’t accidentally attach the riser rail too high on the wall for the shower hose to reach.
Drill and attach the riser rail, turn the water on and check for leaks at all junctions and nip up with a spanner if required.
Summary
Thanks for reading, leave me a comment if you have any questions.
Chris