This article will help you accurately budget your bathroom installation project, whether you’re doing it on a DIY basis or employing professional tradesmen.
Please see typical bathroom installation costs for more information on expected costs which can be read in conjunction with these somewhat ‘hidden’ costs.
1. Plastering / Wall preparation
When old tiles are removed from a wall, a few outcomes are possible:
- the old tiles come of the plaster cleanly, allowing for easy re-tiling with minimum preparation work.
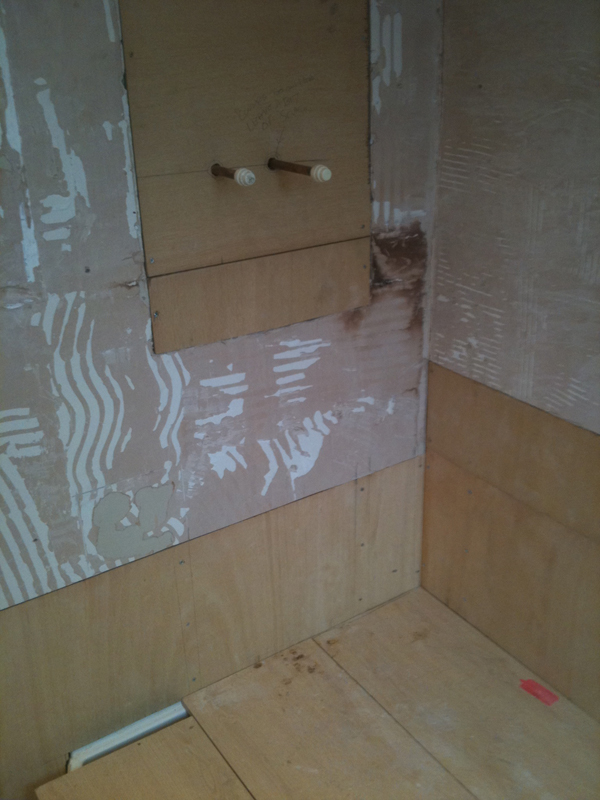
- they bring the wall with them (common on plasterboarded stud walls that have been tiled onto directly i.e. the boards have not been plastered prior to tiling)
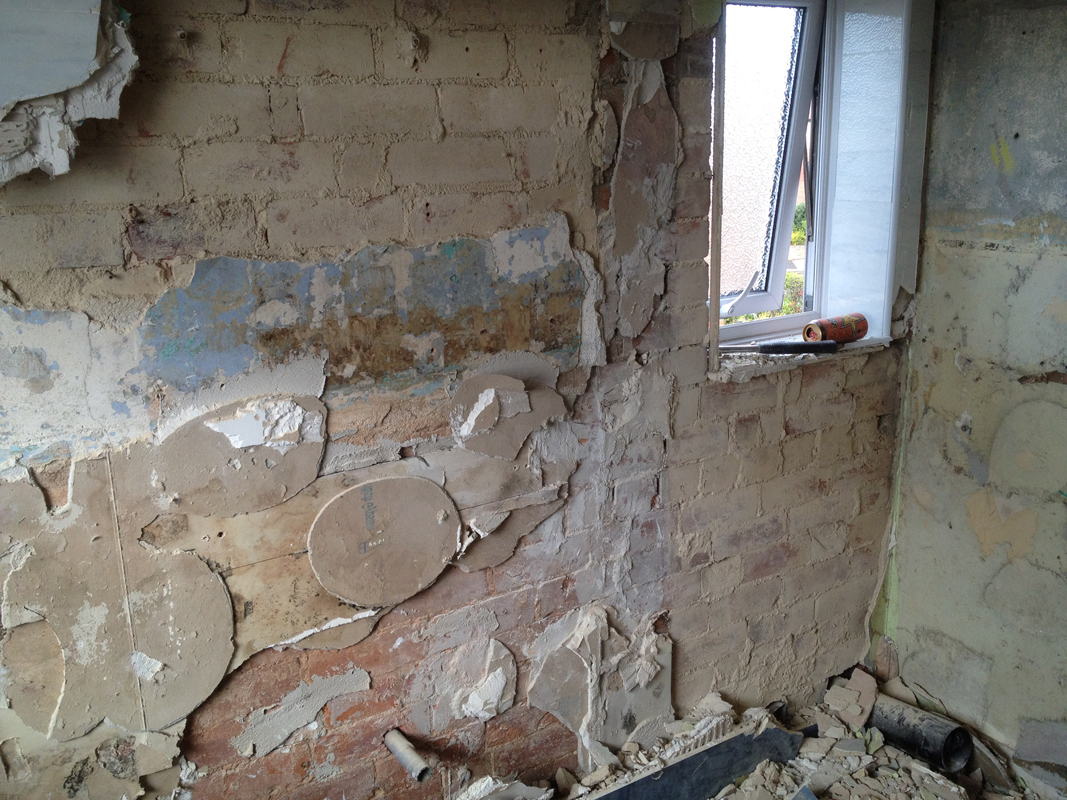
- they expose solid rendered walls which are found to be blown (i.e. the render is not adhered to the brick / block wall behind.)
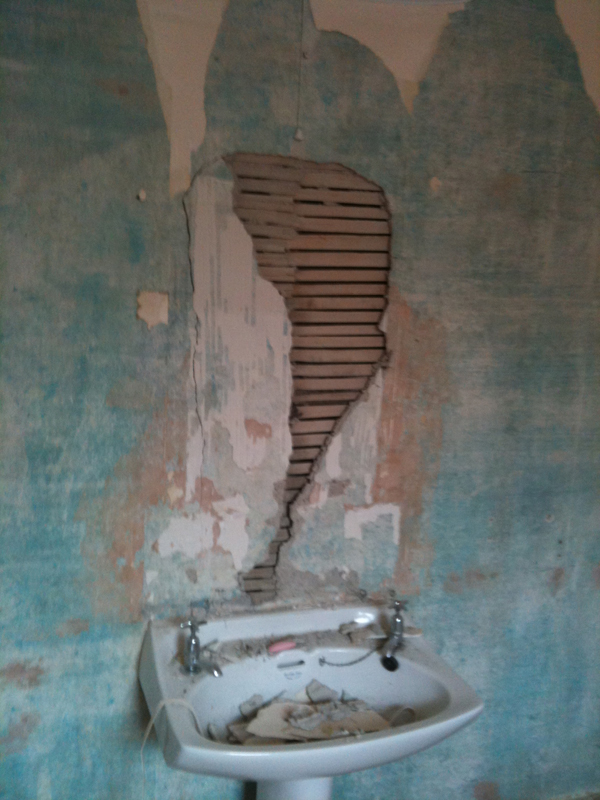
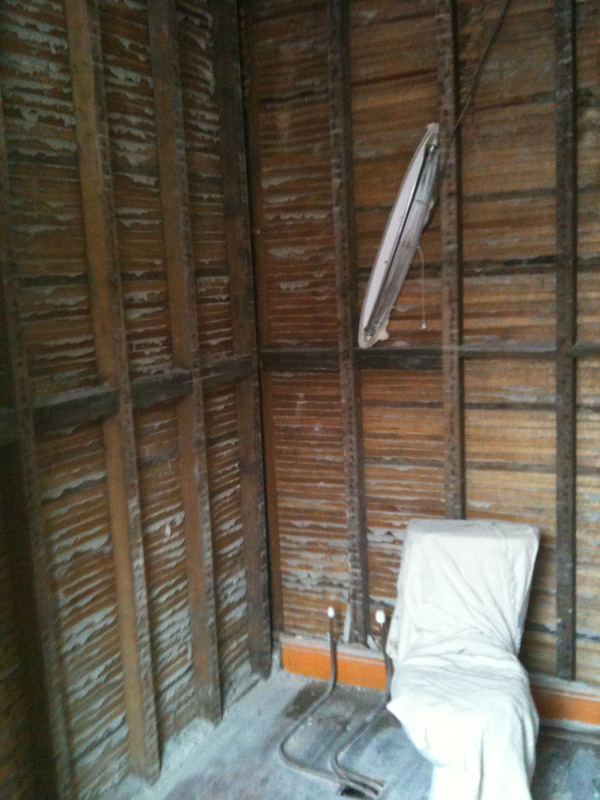
- they expose plaster which is found to be applied to wooden lats mounted between studs (as opposed to a rendered solid wall or directly to plasterboard.)
If the 1st option happens, and the tile comes off easily (as above) then you will have no additional costs in all likelihood (depending on what has been quoted for.)
If the 2nd option occurs and removing the tiles brings the walls with them (as can be seen above), then all of the damaged boards will have to be removed and replaced. They may also need skimming with finish plaster depending on whether you’re fully tiling the walls or not.
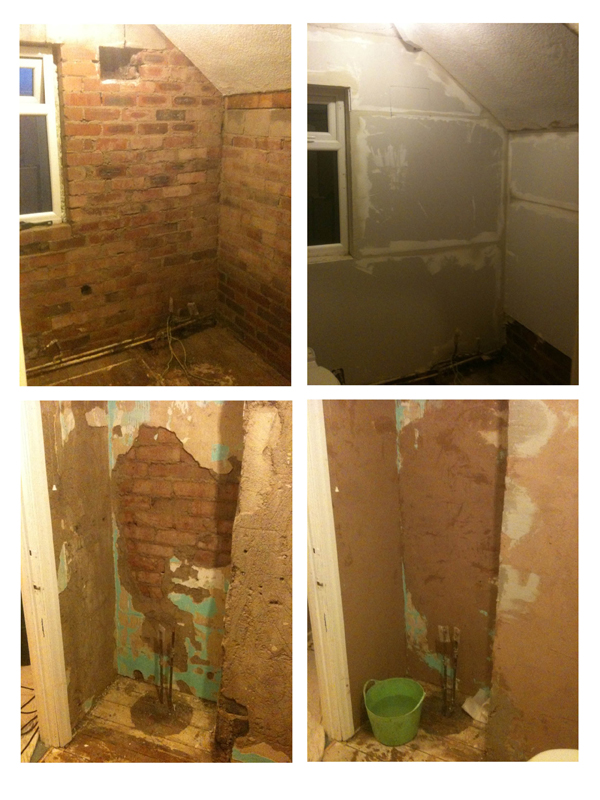
If the 3rd option happens, then the blown render will have to be removed from the brickwork resulting in increased labour & disposal costs and time delays. The bare walls will then have to be sealed and boarded out to give a smooth finish ready for tiling or decoration as can be seen on the top half of the picture above.
On walls where only some of the plaster is found to be blown, the walls may be patch filled with bonding plaster, applied to the spots where the blown render is removed from. This can be seen in the picture above on the bottom.
If the 4th option occurs and you find lat and plaster walls, I heavily recommend removing all the existing render & lats and re-boarding all of the affected walls. This is because render does not stick very well to wooden lats and once the added weight of the tiles is added to the walls, it becomes increasingly likely that the tiles and render will be pulled off the lats and your walls will effectively fall down. In the picture above you can see that we have removed all of the render and lats prior to reboarding.
Please see preparing walls for tiling for more information.
2. Floor preparation
Another hidden installation cost (particularly in relation to floor tiling) relates to the sub floor preparation.
Sometimes it is necessary to carry out some remedial work to the sub floor to ensure the longevity of your tiled floor installation. This may be unknown before work begins (as it is often only found to be necessary upon lifting / removing the existing floor covering) so can be considered an unexpected cost to those unfamiliar with the process.
The necessary work that may need to be done can be summed up as making the floor solid and capable of carrying the large weight of the new tiled floor without deflection to ensure a trouble free, long lasting tiled floor installation.
This may take the form of:
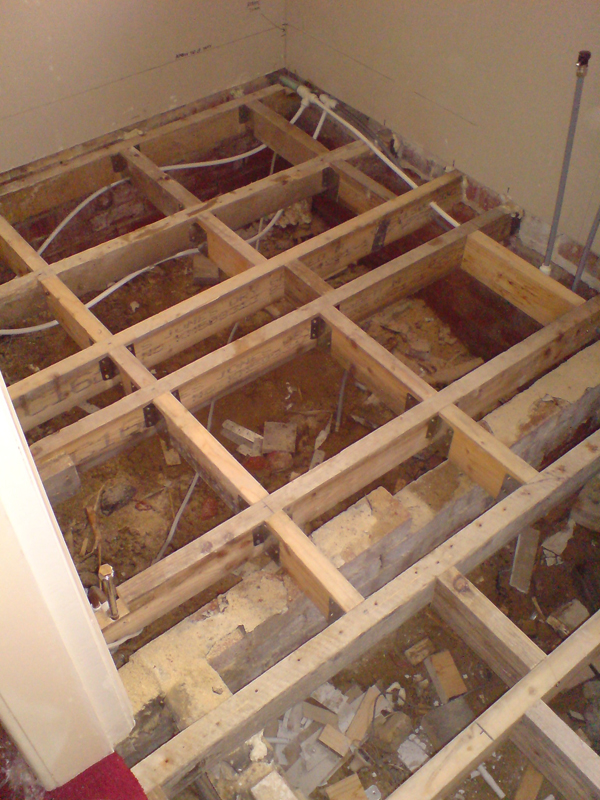
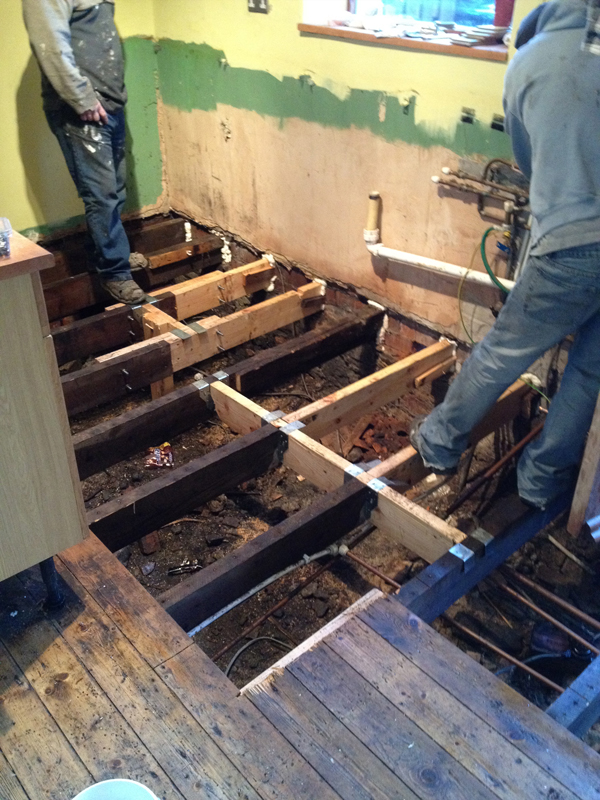
- re-enforcing or even replacing rotten / inadequate floor joists to take the weight of the new, heavy tiled floor, as can be seen in the examples above (all new joists in the example on the left, a few new joists in the example on the right)
- Replacing the existing floorboards with plywood in order to strengthen the floor for the same reasons as listed above. See tiling on wooden floors – prep for more information.
- Replacing / treating rotten or missing floorboards under the existing floor covering.
3. Upgrading electrics
If you are upgrading electrical elements in your bathroom e.g. adding spotlights, an extractor fan, shaver socket, underfloor heating etc, you should be issued with a completion certificate to show that the installation complies with current building regulations (part P).
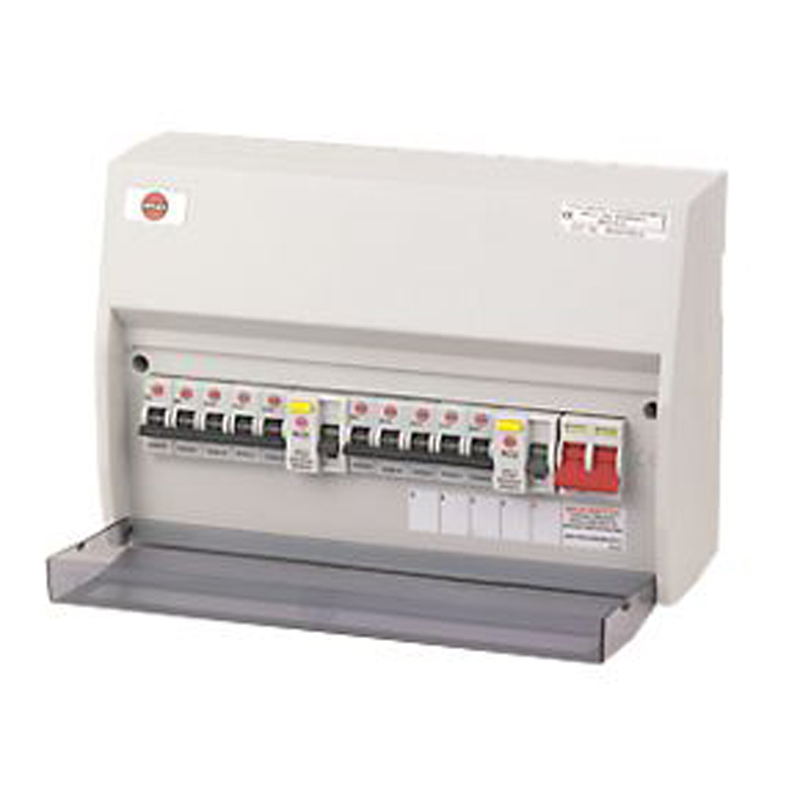
This may require your fusebox or consumer unit (or part of it) to be upgraded to ensure that the new bathroom circuits are RCD protected.
If the electrician / plumber has not allowed for this because they didn’t inspect the fusebox at the time of issuing the initial estimate, you may be forced into the position of having to have the additional work done or being refused a completion certificate by the electrician.
This could cause problems when selling your house (as you do not have documentation to shown that your electrical work is up to current standards.)
PS Fuse box installation / replacement (in itself) can lead to escalating costs, as all existing household circuits have to be tested. Any faults discovered during this testing have to be rectified (at additional cost) before the completion certificate can be issued.
4. Wrong assumptions
Costs are always based on assumptions, most of which are never outlined and only become apparent when a dispute arises.
To limit these, ensure that you and your tradesmen know the arrangements with:
- Who’s supplying what materials & when?
- Whats included in the estimate & whats not e.g. fitting toilet roll holders, towel rails, etc.
- Disposal – who’s getting rid of the waste, when and how?
- Parking & loading – do they need any special permits or will they have to park 3 streets away if you live in London for example.
- Laying out carpet protection in the form of dust sheets / plastic coverings for the duration of the work. i.e. Is this your responsibility or theirs?
- Clearing up afterwards – do you expect the tradesmen to pick up their tools and go (so long as they don’t leave muddy footprints everywhere) or do you expect a full cleanup operation?
This will help the tradesmen to cost accurately and should limit instances where your expectations are not met. Ensure everything is written down so that it can be referred to later.
5. Changing your mind
Once you have agreed to a quote and work schedule, you should stick to your obligations as you would wish the contractor to.
Any work that has to be re-done because the customer has changed their mind is billable and poor planning or instructions on your behalf could lead to you paying for work to be done twice unnecessarily.
For example, moving the position of a toilet, shower, basin, shaver socket etc after all the 1st fix work has been completed and the floors and walls are tiled becomes a big expensive task that could have been avoided by planning properly before work starts or by communicating your wishes effectively. Always write things down!
Summary
So as you can see, there are lots of (potential) hidden bathroom installation costs that can occur which can cost you time and money.;
Although they are all done for a reason (i.e. to ultimately ensure your installation is done in a highly professional manner with no corners cut to ensure longevity) they can swell your budget if you weren’t expecting them.
By being aware of them and also the circumstances in which they occur the most, you can anticipate them and plan accordingly.
Chris

