All Work Carried Out By Ukbathroomguru.Com
Introduction
Fitting a wall hung basin is not always possible as plumbing and support need to be considered at the outset.
i.e you need to be able to run hot & cold supplies to the basin tap and be able to drain waste water away from the basin (normally in or through the wall behind) as well as adequately support the weight of the installation.
A similar installation can be read about here.
Fitting A Wall Hung Basin – Case Study
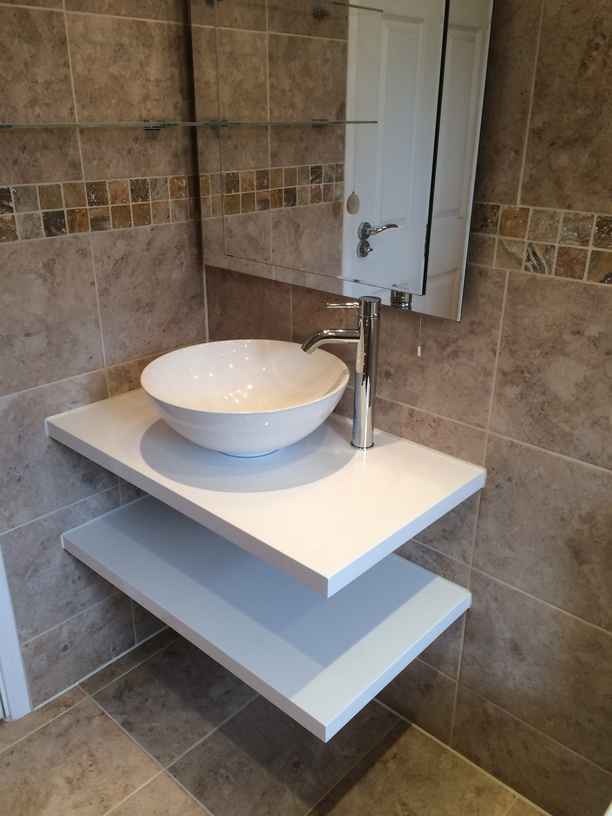
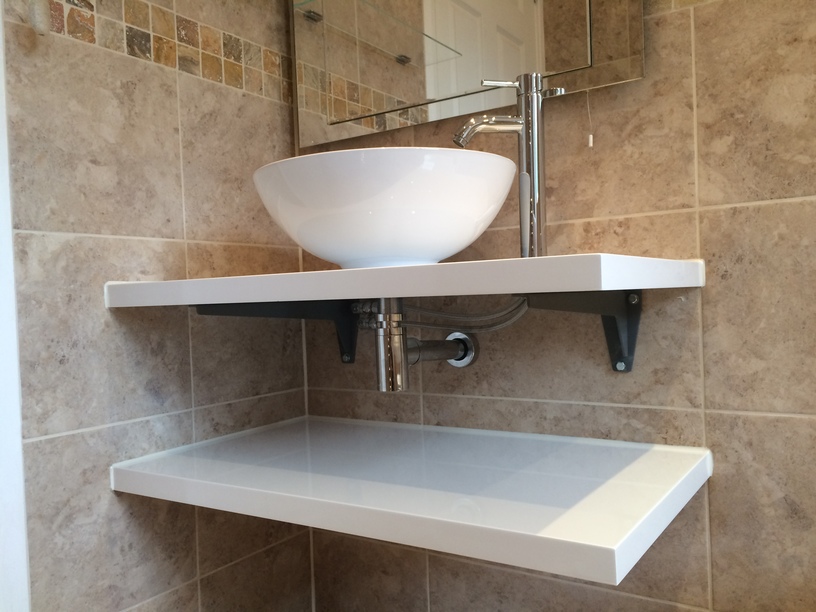
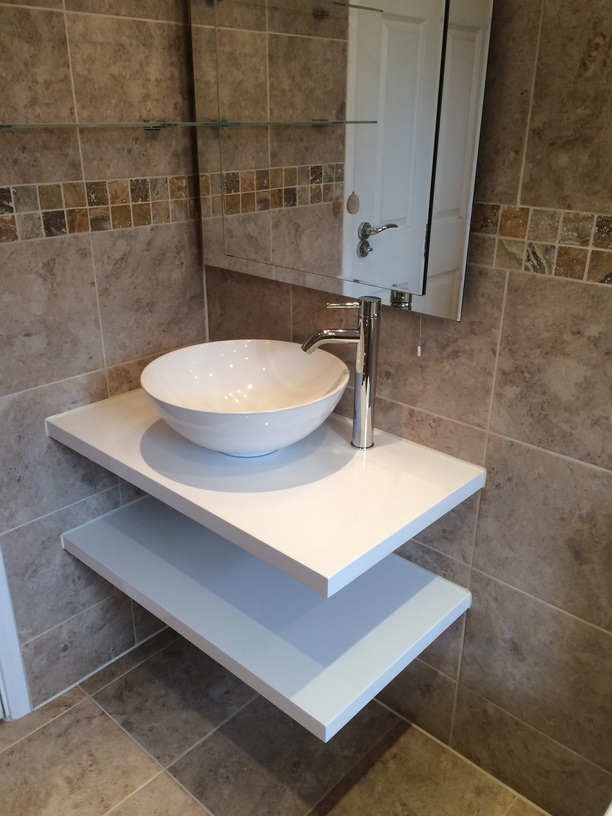
This design features 2 floating shelves set in the corner of the room with a basin sat centrally on top with an up and over tall mixer tap mounted on the top shelf next to the basin.
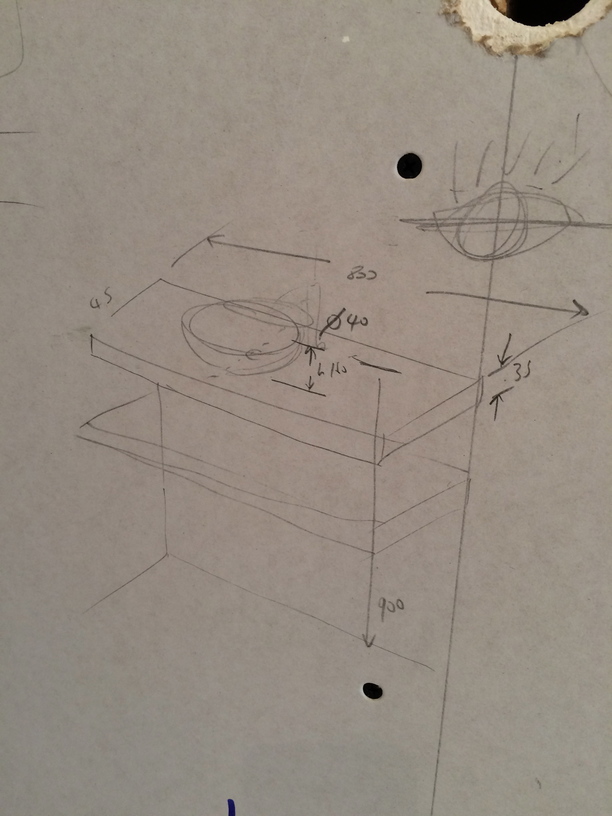
A rough layout drawing is done to decide the position & heights of the various shelves / basin etc.
PS as a general rule start with the height of the top of the basin (80-90cm from the floor) and work backwards from there.
These dimensions are then transferred onto the stud wall where the shelves & basin will be located.
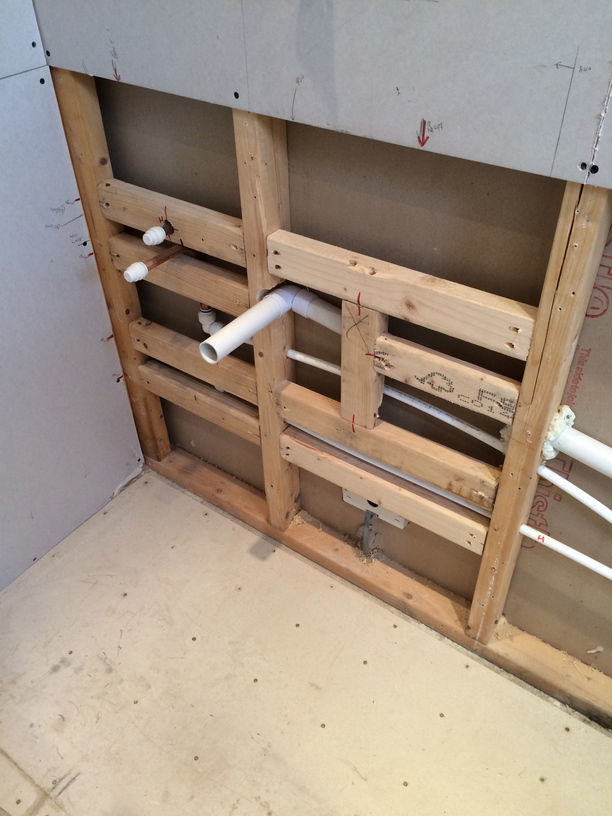
Next hot & cold pipework is run inside the stud wall as well as the waste pipe.
Timber noggins are added in strategic positions so that the brackets that will support the shelves will bolt into them at 2nd fix after the walls have been tiled.
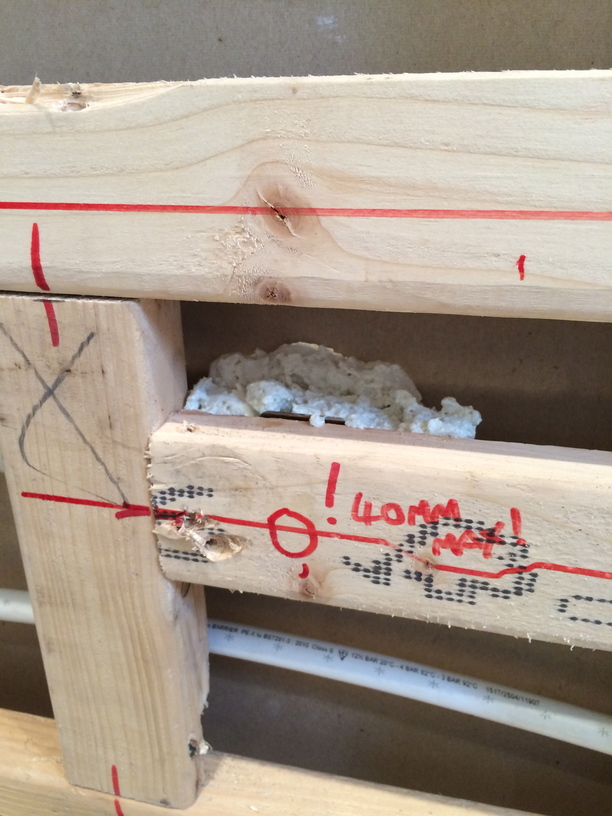
Every pipe penetration and screw fixing is carefully worked out at this stage so that the final result will be neat (without pipes everywhere) and strong (with all the weight of the shelves being fixed directly into the timber studwork rather than just the plasterboard or tiles)
Any points where a supporting screw or bolt may pierce a pipe in the wall at 2nd fix are identified at this stage and appropriate action is taken to mitigate the risks of a leak eg shorter bolts.
Once all the 1st fix plumbing & joinery work has been done, the wall is boarded and tiled ready for 2nd fix.
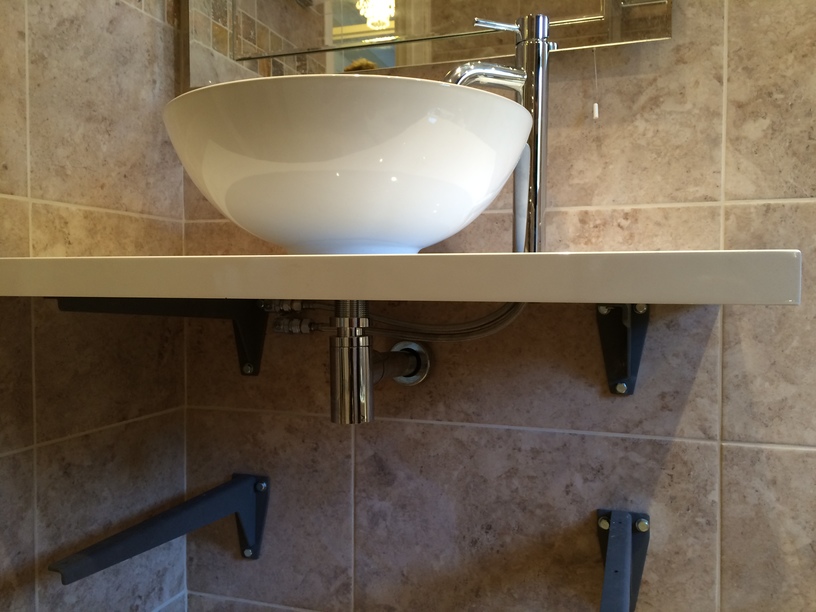
Brackets are attached in the exact location as planned initially, and all bolts screw tightly into the studwork behind, ensuring the shelves will be rock solid.
Angled chrome isolating valves are added to the copper pipework that will feed the basin mixer tap (and allow for future maintenance.)
The top shelf is screwed to the top brackets and a hole is drilled for the tap.
The flexible tap tails are then attached to the isolating valves fitted previously, and you will notice that the valves are brought out in such a position as to do this in a neat manner hidden just below the top shelf.
This is all planned in advance when drawing on the wall.
Next, the basin (with waste already attached to it) is dropped through a newly made hole cut in the centre of the top shelf.
Glue holds it in position.
A chrome pipe connects the trap to the waste pipe already in the wall and a chrome shroud covers the pipe penetration.
The waste pipe has been brought out at the correct height so it has a small fall to ensure adequate drainage.
Finally the bottom shelf is fitted and the edges are sealed with a colour co-ordinated silicone sealant.
Mirrors and other accessories are added and all connections are thoroughly tested.
A similar installation can be read about here.
Summary
I hope you have found this useful, please leave a comment below or get in touch for a free site survey.
Chris
What We Do
We install quality bathrooms from start to finish, with all the bits in between taken care of.
We provide advice and guidance during a free site survey, and we have a blog with lots of articles that cover frequently asked questions and show you examples of our recent work.
We install bathrooms from start to finish, supplying all the necessary trades and project managing the whole process, so you don’t have to! We normally supply & fit bathroom suites but in this example we fitted a customer supplied suite.
We work to detailed, itemised estimates with fixed costs, so you can budget properly without fear of unexpected skyrocketing prices.
Our focus is on doing a proper job for a fair price in a reasonable time – see here for more info or contact me for a quote.
Follow Our Bathroom Board In Pinterest For More Tips And Ideas
Follow UK Bathroom Guru’s board Bathrooms on Pinterest.

